3g Supported Mobile

  • Subscribe to our RSS feed.
  • Twitter
  • StumbleUpon
  • Reddit
  • Facebook
  • Digg

Thursday, 29 September 2011

How To Stop a House Burglar Alarm That Won't Go Off and Stop Beeping

Posted on 06:28 by Unknown

An alarm protects your home from getting broken into because if the burglars attempt to break in, the alarm will set off and they don't like that! If your house burglar alarm is beeping really loud for the sake of it, the people in your neighborhood will start to get annoyed and you will be panicking trying all sorts of solution to stop the alarm siren from beeping so loud. Don't worry though because i have the top 3 instructions that are guaranteed to silence your alarm.

Instructions:

1)Your alarm system will have a password that you punch into the control panel, this is to silence the alarms siren. If you now the password for it, then enter it into the control panel, once you have entered it, the alarm should shut off the siren. If it doesn't work, then re enter the password, as you might have made a mistake the first time you entered it. If that don't work, the password is incorrect, so immediately find the "Test/Diagnostics" menu option in the control box settings and select it. It will put a stop to the alarm because the alarm goes into testing mode.

2)Open the control panel box, you will need a screwdriver to unscrew the tight screws holding the cover in place. Then remove the control panel box cover and unscrew the battery caps from the top of the backup battery, then pull the wires off the battery contacts.

3)If the control box doesn't have a backup battery, then it will have fuses on the circuit board, pull out the fuse that protects the alarm siren. If you pull it out, it will break the circuit that provides power to the siren.
Read More
Posted in | No comments

How To Save Xbox 360 Games To a USB External Flash Drive

Posted on 06:13 by Unknown

Thanks to Microsoft adding usb ports on the Xbox 360 console, it means you can insert a usb flash drive into one of them add copy games. If you are running out of storage space on the hard drive, you can copy some games onto a usb memory stick, to free up space on the hard drive. Your usb flash drive must be a minimum of 1 GB and a Maximum of 16 GB and has to compatible with FAT 32, for it to work.
Instructions:

1)Power on the Xbox 360 console and insert your usb flash drive into a free usb port.
2)Using your controller, open the "My Xbox" menu and then select "System Settings".

3)Then choose "Memory" and your usb flash drive will come up, then select it. 

4)It will ask you to configure the usb flash drive with the console, so select "Configure" and then choose the option "Yes".

5)Once the usb flash drive is configured with your Xbox 360 console, you can now save full games directly to it. All you have to do is when you want to save a game to the usb drive, is to select "Usb Storage Device" when asked from the game you are playing.
Read More
Posted in | No comments

How To Connect 6x9 Speakers To Head Unit, Not To an Amplifier

Posted on 04:02 by Unknown

If you have fitted a pair of 6x9 speakers in your cars parcel shelf and you want to power them and you don't have a car amplifier to give them full bass and treble potential, then you can connect the 6x9 speakers to the car head unit and get similar sound results. Wiring 6x9 speakers is not an impossible task; all that is required is speaker wires connectors and insulation tape.

Instructions:

1)Get your speaker wires and on each ends, attach the connectors onto the wires and then onto the terminals on each 6x9 speakers, with correct polarity.

2)Run the speaker wire down your car, so it reaches to the rear of the car head unit, this may involve you to remove side panels, so you can fit the speaker wires in your car.

3)Remove your car head unit from the din slot, look on the wiring harness for the rear speaker wires, there are two sets of them, one set is left and the other is right, both which have a positive and negative wires.

4)Use a wire cutter, remove the plastic insulation coating on the wires, this is to reveal the copper wire.

5)Now connect the 6x9 speaker wires with the colour coding, red is positive and black is negative, found on the wiring harness, with the correct polarity . Apply this step for the second 6x9 speaker. Once the wires have been connected, you can use insulation tape to tape the exposed braids of the wires.

6)Insert the car head unit back into the din slot.
Read More
Posted in | No comments

Do Subwoofer Enclosure Terminal Cups Melt When It Comes To Big RMS Power?

Posted on 03:59 by Unknown

Can the terminal cups used on subwoofer enclosures melt?

A terminal cup is fitted into a subwoofer enclosure, to make connecting and disconnecting it from the amplifier much more easier, as all you have to do is unscrew the terminals and slip in or out the speaker wires and screw them back up. But there are known to cause leaks in a enclosure, if they are not sealed up correctly around the edges, as air can escape easily out, therefore reducing sound quality. A terminal cup is made out of cheap plastic, they can't really handle high current and amperage from large speaker wires, so they simply melt away, but it depends on how much power you are running to you subwoofer. In general, if you a pushing more than 2000 watts rms, to your subwoofer using terminals cups, they will melt. If you're only running small amplifier power, like 300 rms to the subwoofer, there will not be enough current and amperage to melt the plastic, so it won't melt.
Read More
Posted in | No comments

How To Clean a Car CD Player Head Unit

Posted on 01:02 by Unknown


After some time, the faceplate on your CD player car head unit will become dusty and dirty and if cleaned, it will look brand new, once again.

Instructions:

1)You want to get hold of a cleaning cloth that is has soft fibers, you could use a dashboard cleaning cloth, but make sure you don't use a towel because you don't the appropriate cloth, you will cause large scratches to be visible and seen on the faceplate.

2)Dashboard cleaning spray works perfect for shining plastics, so it will work perfect for a CD player faceplate because that is made from plastic. So remove the faceplate from the CD player head unit, there sold be a release button and it should pop out into your hands.

3)Spray the dashboard cleaner spray onto the faceplate and using your cleaning cloth, rub it in upwards and downwards. Don't clean in any sort of circular motions, if will causes small circle scratched that can been seen in direct sunlight.

4)Once polished, re-attach the faceplate back onto the CD player head unit.
Read More
Posted in | No comments

How To Clean a Car Subwoofer Without Damaging The Cone

Posted on 00:58 by Unknown

If a car subwoofer is dusty, the dust can enter into the voice coil, make the sound quality suck, it can also make the sub look like crap, so give it a quick clean, it won't take you long. When cleaning a car subwoofer, you have to be extremely careful, as some parts are very delicate and could get damaged if you apply to much pressure.

Instructions:

1)If you car subwoofer has a protective grill placed in front of it, you will need to clean that first. On most subs the grill is made out of metal, if so, get a soft cloth and give it a wipe. Water will not be necessary as it can cause the metal to rust. If the protective grill is made out of a fabric, use a vacuum cleaner to suck up the dust.

2)Next you will need to clean the driver, so remove the protective grill, it should clip off or be held with screws, if so, then unscrew them using a screwdriver and place them in a safe place.

3)Once the grill is off, get a soft paint brush and remove the dust on the rubber surround, then set your vacuum cleaner on the lowest suction power setting and using the hoover nozzle, suck up any remaining dust.

4)Next you will need to clean the cone, if the cone is made out of paper, don't use water, when cleaning with a soft cloth. If you do, you will weaken the cone. If the car subwoofer cone you want to clean is made out of PVC, a plastic material, then apply some water to a soft cloth and clean the cone, softly, without applying hard pressure. Make sure you are gentle when cleaning a cone that is made from plastic, as it can crack.
Read More
Posted in | No comments

How To Clean a Car Exhaust Muffler Backbox

Posted on 00:41 by Unknown

If you cleaned the bodywork, wheels and interior of your car, the only that will make the car disappointing to look at is a dirty looking exhaust muffler. The exhaust allows hot exhaust fumes to exist through the muffler, this can cause the colour of the outer metal around the muffle to look burned and discoloured. You could get a jet wash and place the spray hose into the exhaust, but that will cause the inside of it to rust, which will shorten its life. Well i have avoided this method on my own cars muffler, so i have came up with an alternative method that works great and brings back that shine, without any negative effects happening to the exhaust.

Instructions:

1)Get either a dry towel or 3-4 paper towels and using either of them, give the exhaust muffler a good scrub, this is to remove unwanted soot and dirt, as much as possible.

2)Then go into your kitchen and using a spoon, mix about 1 teaspoon of washing up liquid, with a quart of water that is warm, from a hot tap, or kettle.

3)Using a old rag, rip it into the cleaning solution your have made, and scrub the rag all over the outer exhaust. The cleaning solution you have generated is excellent of getting rid of thick grease and nasty stains.

4)You can then give it a good final polish, using aluminum polish, using a soft fiber cloth. Simply apply the polish onto the outer muffler, then using your cleaning cloth, give it a good rub, with a bit of elbow grease! Polishing the muffler using specialized polish helps it look brand new factory look and also helps prevent it from getting greasy and dirty.
Read More
Posted in | No comments

Wednesday, 28 September 2011

What Does Decat Mean On a Car?

Posted on 05:56 by Unknown

What does decat mean on a car?

The word decat, stands for D-for delete and C-for cat, which stands basically for a deleted catalytic converter. A car exhaust system has a catalytic converter fitted to it, to remove the dangerous gases created by gasoline burned in the engine. The job of it is to make them less harmful, when released into the atmosphere. To decat an exhaust system, you will need to remove the catalytic converter and replace it with a straight through pipe. The main reason why people apply a decat to the car exhaust system on cars is because to make the sound of the exhaust sound more louder or to make it afterfire and pop. Another reason why you should decat a car exhaust system is because it increases the amount of increase the flow of gases in the exhaust, this can increase power and performance slightly.
Read More
Posted in | No comments

What Is a Car Catalytic Converter For?

Posted on 01:36 by Unknown

There are millions and millions of cars and trucks on the road today that are causing a ton of pollution into the atmosphere around use, this can create big problems for all of us and the environment. So to eliminate it happening from cars and trucks, a catalytic converter is placed in line with a car exhaust system to convert harmful and dangerous pollutants from the fuel, that are Hydrocarbons, Nitrogen Oxides and Carbon Monoxide, converting them into less harmful emissions before they leave the exhaust system and get into the atmosphere.
Read More
Posted in | No comments

How To Remove a Catalytic Converter From a Car Exhaust System

Posted on 01:08 by Unknown
If you want to remove the catalytic converter from your cars exhaust system and you want a louder sounding exhaust, you might want to replace it with a straight pipe, to decat the exhaust. Or you might want to replace it with a brand new catalytic converter, if the current one that is fitted is damaged. In order to replace it, you will need to know how to do so, to help you remove it, i have provided instructions below: 

1)Drive your car to a location that has a flat, solid surface, then jack up the car and place it on jacks stands.

2)Now you have do get underneath the car, look at the middle area of the exhaust system, you will spot the catalytic converter. It looks like a wide rectangle shape, you can't miss it!

3)Look to see how the catalytic converter is attached. On most cars, altogether there are about 4 bolts, about two in the front and two in the rear, bolts that hold it in place. Once you have found the bolts that hold it on the exhaust system, find a socket that fits each of them.

4)Then attach the socket to the ratchet and using it remove the four bolts. Once the bolts have been removed, then pull out the catalytic converter from the exhaust system.
Read More
Posted in | No comments

How to Remove a Car Subwoofer

Posted on 00:45 by Unknown
If you need that extra storage space in your car, you will need to use your trunk for it, but if there is a big car subwoofer in it, you don't have no storage space in your car, as it takes all the room up. If don't want a car subwoofer because you no longer want to be listening to bass. If so, for both reasons, you might want to remove and to help you do that, instruction are provided below:

Instructions:

1)Open the trunk, if the car subwoofer is powered by a car audio amplifier, then before you removing anything, open the hood and disconnect the negative terminal off the battery post, in case a short circuit happens, doing this will prevent damaged to occur to other electrical items in your car.

2)Using a screwdriver, unscrew the 2 screws found on the car amplifier, that hold the speaker wires in place.

4)Once unscrewed, remove the wires from the terminals and then screw up the loose screws.

5)Once you have done that you can, if you have a large car subwoofer with a big, heavy magnet, it is best to remove it from the enclosure first. This is so when pick up the subwoofer box, it will be lighter, therefore making it easier for people who are not strong, when it comes to lifting heavy stuff.

6)If you want to remove the sub from the enclosure, get a screwdriver and unscrew all the screws that hold it down. Once you have done that, place the screws in a safe place, now the car subwoofer will be free and you can pull it out and then disconnected the speaker wires that are attached to it.

7)Using your hands, remove the enclosure from your vehicle, place the enclosure and the subwoofer in a safe place, in a location that is dry and dust free, as you may want to sell them or install them back into your car in the future.
Read More
Posted in | No comments

Tuesday, 27 September 2011

How To Magnetize a Screwdriver Bit Tip Quickly

Posted on 04:24 by Unknown

If a screwdriver has a magnetized tip, it can hold a screw in place and prevent the screw from falling off the bit. Some good quality screwdrivers are already magnetized from the factory, however some cheap ones are not. So you can make your non magnetized screwdriver, magnetized, yourself.

Instructions:

1)Get a wire stripper and strip off 1 inch of exposed of the copper core found on each end of the wire.

2)Next, wrap the wire numerous times around the shaft of your screwdriver you want to magnetized.

3)Connect one end of the wire to the negative post on the battery and touch the other end of the wire to the positive post on the 6 volt battery. When you have done this, you may see little sparks being generated, nothing to be worried about.

4)Remove both wires from the posts of the battery, get a screw to test that screwdriver tip is magnetized, it should be.

5)If the screwdriver tip is doesn't seem to have a strong enough magnetism to pick up a screw, repeat the process again.
Read More
Posted in | No comments

How To Fix Crackling Computer Speakers

Posted on 04:08 by Unknown

If you notice a crackling sound from your computers speakers when they are turned on and are playing sound, then it can make the sound irritating to your ears. If your computer speakers are making crackling noises, then the solutions are below to put it to a stop:

1)The sound card could be faulty, so plug the 3.5mm jack from the speakers, that connects into the green socket on the sound card into a mobile phone or mp3 player. Then to test if the sound card is the problem and is faulty, play a music file and turn on your computer speakers to a suitable listening volume. If you don't hearing any cracking, the sound card is the cause to the problem. So get a can of compressed air and attach the small straw to the can and insert the straw into the 3.5mm jack socket on sound card, give it a good spray. There could be dirt on the pins inside it that can cause crackling. If cleaning it doesn't' solve anything, update the audio drivers, if that don't work, then replace the sound card.

2)Check the back wire of the speakers, if it looks look bent and weak, the wires are likely to be broken inside, causing them to touch against each other and cause crackling. So if you have some good soldering skills and the right tools for the job, you can cut the wires off and redo everything.

3)The speakers could be faulty or damaged from distortion, this can cause the voice coil to loose its touch. Check the speakers on a audio device that takes a 3.5mm jack, if you hear crackling, the speakers are knackered, so you will need to buy a new pair.
Read More
Posted in | No comments

How To Clean Out & Unclog a Dity Clogged Car Fuel Filter

Posted on 03:49 by Unknown

A fuel filter is fitted into a car engine to stop impurities occurring in the fuel or from older fuel in the tank, from reaching the car engine. If the fuel filter becomes dirty and clogged, it can make your car shake at idle, your car will frequently stall, it will also struggle to start up and the power and performance will be certainly decreased. So you could replace clogged fuel filter, or you could clean it, which is easy for anybody to do and is free.

Instructions:

1)Locate the fuel line, it comes into the car fuel injector and carburetor, then trace the fuel line and it will lead you to the fuel filter. The fuel filter looks like a small cylinder shape canister. that can be made either from metal or plastic.

2)Once you have found the fuel filter, screw the hose clamps onto the fuel line about 5 inches away from the actual filter, on both entrance and exit hoses.

3)Then tighten the clamps for the hose, with a flat head screwdriver, then close the hose with the clamps, this is to prevent fuel from spraying out in your face.

4)Get an ordinary container, like a glass jar and place it underneath the fuel filter, then unscrew the hose clamps that attach the hose to the filter. When you have loosed the clamps, remove the hose off the fuel filter and let any unnecessary fuel get dumped into the glass jar. Once the fuel filter is free of the hoses, you can then drain any remaining fuel that is inside the fuel filter into the glass jar, if you want to.

5)Next hold the fuel filter, so one of the ends is pointing in the direction towards to glass jar. Get the cleaning solution and attach the small black straw that comes supplied with it. Now inert the straw into the clogged up fuel filter and spray. When you spray, you will notice all the gunk will be removed and transferred into the glass jar.

6)Leave the fuel filter to try, leave it to dry for about 2 hours. Once it has dried out, you can then re-attach the fuel filter were you removed it from.
Read More
Posted in | No comments

Monday, 26 September 2011

How To Stop Your Car From Shaking When at Idle

Posted on 08:52 by Unknown

If your car shakes, when it is at idle, during traffic, it can get annoying, as the complete car shakes, even the steering wheel shakes, making your hands vibrate! If you find that your car is shaking when stopping and you find it a problem, then the solutions to resolve it are provided for you below:

1)If your car shakes when you step on the brakes, while driving and your car shakes like mad, then i would certainly suggest you to have a garage to measure the rotors, this is to work out if they can be turned, or if they are faulty because if they are warped, then they can replace them for your car. Basically a rotor is what the brakes pads grabs, to stop the car to a halt. If the rotors are warped, is means that when apply the brakes, it will cause the car to shake.

2)The fuel filter could be clogged up. So locate it and examine it, if it looks in a bad state, then it is clogged up, so replace it with a brand new fuel filter, as they are not worth the hassle to clean, as it is cheap to replace anyway.

3)Check all the spark plugs are firing correctly. If any spark plugs are misfiring, that can cause the car to struggle to start up and shake.

4)The idle rpm for your car could be set to low, so increase it slightly, this is by adjusting the accelerator linkage.

5)Your car could be hungry for fuel, check the fuel gauge on your car, if it is showing that the fuel tank is almost empty, top it up with more fuel.

6)Check if the motor mount is broken, if it is, replace it.

7)Your car may need to get wheel balanced, as the wheels can be out of balance, if any one wheel is out of balance, it can add more weight around one part of a wheel, this can cause shaky vibrations at idle and at high speed.
Read More
Posted in | No comments

How To Fix a Car Window That is Off Track

Posted on 07:50 by Unknown

A common thing that happens to the driver's side car window, is that it gets stuck, when a drivers side window is stuck, it usually shows a clue that the window is off track, the track inside the actual door frame. If your driver's side window is automatic or manual, it still moves up and down by rollers on a track. You could go to a car window technician to get it fixed, but you can do it yourself, as it is not that hard to sort out this problem.

Instructions:

1)Revise a diagram of the driver's side door, they can be found online or library or usually in the back of your cars user manual. Hidden screws that hold the door card onto the actual car door can't be found easily and can be hard to reach and unscrew. So it would be best if you could get a repair manual to help you figure out how you can disassemble the door.

2)Use an appropriate size head screwdriver to unscrew and remove the window cranks, armrest, cup holders and anything else that is held on the door. Then remove the screws securing the door panel to the door.

3)Now remove the door panel from the actual door. Now examine if the window rollers are lined up in their tracks.

4)Look at the rollers really carefully, this is to see if they are worn, if they are worn, you would need to replace them. You can purchase new rollers from your local car dealer or from the internet.

5)Line up the window and the rollers, making sure that they are in the track properly. Then clean off any
filth, dust or grease from the windows apparatus.

6)Then add some fresh lubricant onto the rollers and the tracks.


7)Secure the door panel over the interior of the actual car door. Once you have done that, reinstall the window roller, ( if it is a manual window) and other attachments that go with the door.
Read More
Posted in | No comments

How To Replace a Cigarette Lighter Socket/Plug In a Car

Posted on 07:41 by Unknown

If the cigarette lighter socket in your car is not working because you have tested it and it is faulty, then you will need to replace it. You can get it replaced by a qualified car technician, but you can also replace and install it yourself, to save some money.

Instructions:

1)First locate the fuse that is protecting the cigarette lighter plug you want to replace, then remove the fuse to break the circuit. Removing the fuse is vital because if you mess the wiring up, then you could cause damaged to other electrical things in your car. To locate the fuse that protects the cigarette lighter, check in the user handbook for your car's make and model.

2)You will now have to remove the faulty cigarette lighter socket, so remove it from the car's dashboard, this is by inserting a flat head screwdriver into the sides of the cig socket. It should pry out, if not, you will need to release the metal clips that hold it in place.

3)Once removed, you will see two wires that are connected to it, that use spade connectors, remove them both, so they are disconnected.

4)Now get the replacement cigarette lighter and connect the spade connectors onto the spades on the rear of it, matching the red and black colours.

5)Once you have connected the wires, you fit it in, this is by pushing the outer case into the dash hole.

6)Once pushed in all the way, the two metal clips will lock the cigarette lighter socket in place, so it can't move.

7)Now all is left is to replace the fuse you removed and your done:)
Read More
Posted in | No comments

How To Fix Nokia N91 Hard Drive Not Available/Not Found Solutions To This Problem

Posted on 01:02 by Unknown

The Nokia n91 is the best mobile phone, when it comes to music, with high end sound quality and has enough storage for tons of high quality encoded music, but it suffers the common hard disk error. If you have a Nokia n91 and you get an error message displayed on the screen that says "Hard drive Unavailable" or "Hard drive not found", then i have the solutions to this problem.

The common working solution to fix this dreaded problem, is to reset the mobile phone, this is easy for you to do. Simply power on the phone and enter the reset code which is:*#7370#. Once you have entered the reset code, it will ask you to enter a code which is: 12345. Once entered, the phone will reboot and will be reset to factory settings and should make the hard drive work.

If the reset doesn't work, then update or reinstall the firmware on your Nokia n91 that is having hard disk problem, as there could be fault developed in the firmware that can stop the hard drive from working.
Read More
Posted in | No comments

How To Fix a Nokia N95 screen with No Backlight

Posted on 00:53 by Unknown

If your Nokia n95 mobile phone has no backlight, to light up the LCD screen, then you can hardly see what is being displayed. This is because the backlight acts as a torch; it is placed behind the screen to brighten it up. If your Nokia n95 screen has no backlight, then the solutions to fix this problem are below:

1)It could be a bug in the firmware version that your Nokia n95 is currently running, a bug that can disable the backlight to work. So i would recommend you to update, or reinstall the firmware on your Nokia n95, before replacing the any hardware. To update it, you will need to have Nokia Software Updater installed onto a computer, with a fast internet connection, a mini usb cable and a fully charged Nokia n95. Then connect the phone to the computer, via usb and run the updater software and follow the onscreen instructions.

2)If updating or reinstalling the firmware didn't work, then have you recently dropped your n95? If you have dropped it, dissemble the phone and remove the screen, this is to see if it looks cracked or smashed. If it is cracked or smashed, you will need to replace the screen.

3)If the screen looks fine, then make sure the ribbon that connects the LCD screen to the circuit board is secured. A loose ribbon cable that is not properly connected can cause no backlight.

4)The ribbon cable that connects the bottom circuit board with the top circuit board can be worn out, due to age. Dissemble your phone, check the ribbon cable, does it look torn or worn? If so, it can cause this problem, so replace it.
Read More
Posted in | No comments

What Does Lows, Mids and Highs Mean In Car Audio?

Posted on 00:17 by Unknown
In car audio, there are three components that create sounds, which are lows, mids and highs that all, well most car audio enthusiasts are aware about. But there are some new comers and don't really have a clue on what they mean. So i am going to explain all three to you.

 
Lows stands for low frequencies that are between 20-120 Hz, it is the frequencies that creates the boom boom sound, called bass. Lows are meant to be played on a car subwoofer, with a enclosure, because a subwoofer has a large cone area, to produce the low sounds.


Mids stands for sounds that are mid ranged that are between 120-2000 Hz frequencies. The mid sounds are played on a loudspeaker, a speaker that is usually mounted in front door panels. This speaker has a role to create voice heard in music.


Highs stands for sounds that are high pitched that are between 2000 Hz-20,000 Hz. and are sounds that a loudspeaker or subwoofer can't produce. The highs are played through tweeters, which are connected to a crossover to send just the high frequencies to it, to prevent the tweeter getting damaged. Tweeters usually make the overall impression of sound to be more clear and to enhance the amount of sound quality heard in your car audio system.

If you have a car equalizer that says, lows, mids and highs, it will have a slider under each of them three. Each slider will increase the amount of db of that sound frequency. For example, if you increase the low slider and decrease the mids slider, you will hear more bass. 
Read More
Posted in | No comments

Sunday, 25 September 2011

How To Make a Slow Sony Ericsson W995 Faster

Posted on 03:33 by Unknown

If you experience that your Sony Ericsson w995 is buggy and slow, it can lead to the mobile phone screen to hang and freeze up the mobile phone, making it unusable. I have a Sony Ericsson w955 as my daily mobile phone and the sound quality for music is great, but even for me, this handset performs so slow, so i came up with tips to help speed up the processor and ram speed and it helped increase the phones performance dramatically. So i have listed them tips below, so you can also make your w995 faster.

1)Close any applications or games that are running in the background , if you are not using them. If they are left running, the ram is clogged up, the CPU is slowed down and the battery life decreases.

2)You may have too many files stored on the phone memory or memory card, too many files cause the CPU to slow down because it has to work hard to find them. So delete any unwanted files you no longer need or use.

3)Make sure it is running the latest software version, as it has improvements on the speed and stability of operating system.

4)Make sure you are not using themes with lots of high resolution graphics and animations, as if you do use them, they can slow down the CPU speed, as it has to work extra hard to load the graphics and animations. So stick to the stock Sony Ericsson theme.

5)Every day you should restart the mobile phone. This is by powering it off, by holding the on/off key down for 5 seconds. Then remove the battery from the phone for 30 seconds and then reinsert the battery and then turn on the phone.

6)Make sure that the phone is virus free because mobile phones can catch viruses from websites that allow you to download free themes, games and ringtones. You can install a antivirus application onto the phone, to scan and find them unwanted viruses!
Read More
Posted in | No comments

How To Soft Reset a Nokia 5800 To Factory Settings, Using a Reset Code

Posted on 02:46 by Unknown

If you want to soft reset your Nokia 5800 to factory settings, this can be done by entering a soft reset code into the handset.

1)Make sure the battery is charged, if the battery has no power, leave it on charge and power it on, using the power from the charger.

2)Power on the mobile phone, once it is on, enter the following soft reset code in the dialer screen: *#7370#.

3)Once you have entered that reset code into your Nokia 5800, it will then ask for the default security code password, which is 12345, unless you have changed it.

4)Once entered that, the phone the reset will be confirmed, when the reset is completed, the phone will reboot and will ask you to enter the time and date.
Read More
Posted in | No comments

How To Perform a Hard Reset On a Nokia N91 Phone, Using a Master Reset Solution

Posted on 02:40 by Unknown

If you want to completely remove all the data that is stored your Nokia n91 internal hard drive, then you will need to perform a hard reset on your phone.

Instructions on how to reset a Nokia n91:

1)Make sure the battery has at least 10% of battery remaining on it, if the battery is flat, then plug it in for a charge.

2)Make sure the Nokia n91 is switched off.

3)Now you will need to hold down three buttons that activate the hard reset function to work, these buttons are: the green call key, the *button and the 3 button.

4)While holding all of them three buttons down, you will then need to press down the power button on the Nokia n91, this is to switch it on.

5)If you have followed the instructions correctly, the screen will say a message that says "Formatting". When this message appears, you can let go off the buttons.
Read More
Posted in | No comments

How To Soft Reset a Nokia N91Phone Using a Reset Code

Posted on 02:29 by Unknown

If you want to reset your Nokia n91 to factory settings, this can be done by using a soft reset code that Nokia has created. 

This will not remove any passwords or security codes!

Instructions on how to soft Reset a Nokia n91 mobile phone:

1)Make sure the battery has at least 10% battery life remaining on it, if the battery is completely dead and the Nokia n91 will not power, leave it on charge. 
2)Once the Nokia n91 has sufficient battery life, with a sim card inserted into it, power on the mobile phone, by pressing the power button.

3)Wait for the mobile phone to land onto the home screen menu, slide down the protective slide cover and enter the following reset code into the phone's keypad : *#7370#


4)Once you have entered that code, the screen will display a message that says "Restore all original phone settings? Phone will restart". Then select the "Yes" option. 

5)The mobile phone will restart and will be restored to factory settings.
Read More
Posted in | No comments

Saturday, 24 September 2011

How To Make The Screen Rotate On a Nokia N95 Automatically

Posted on 04:55 by Unknown

If you have a Nokia n95 mobile phone and you want the screen to automatically rotate, when you move the Nokia n95 horizontal, then you will need to make sure it is running the latest up-to-date firmware version. This is because the older firmware versions didn't include the rotate feature, as the automatic screen rotation is added to the latest firmware version, officially by Nokia.

If you don't have a computer, with internet access, or don't have a usb cable. Then you can't update the firmware on your Nokia n95, to get the rotate feature. So as an alternative solution, you can download an application called "Rotate me", that is available for free to download from your mobile phone, from Ovi store. You can use this autorotate app on the 8GB version as well as the normal.

Once downloaded, install it into either the phone or mass memory.

Once installed, you will need to turn off your Nokia n95 and power it back on, this is to make the application work.

Now when you hold your Nokia n95 vertically, while viewing a picture and move the position of the Nokia n95 to horizontal, the screen will rotate.
Read More
Posted in | No comments

How To Fix & Repair a Video Tape That Is Chewed Up Or Tangled Inside

Posted on 04:39 by Unknown

If you have a video tape that has the brown film chewed up or tangled inside, you can't use it again. The main possible reason why your video tape got chewed up or tangled is because the head on your VHS player is probably been magnetized from other video tapes your have inserted into it. You are supposed to use a demagnetizer cassette to prevent this to happen, so remember next time!

Instructions:

1)Get hold of the video tape that is chewed or tangled up.

2)Then you will need to open to flap that exposes the film to the head inside the video player. This can be done by inserting it into a video player, however in this sort of situation that can't be done, so on each corner of the flap, you will notice small square buttons, one placed on each side of the video tape. Using your finger nails, push down both square buttons and then pull the flap upwards.

3)Next get a screwdriver and insert it into the small hole, found in the middle of the tape, right at the bottom. Make sure you push the screwdriver so it pushes back the key located inside the tape.

4)Then turn the left roll in the clockwise direction, stop turning it when the film is no longer in a tangled mess and is returned back into the video tape.
Read More
Posted in | No comments

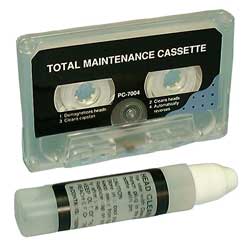
How To Demagnetize a Tape Deck Head

Posted on 04:08 by Unknown


It is very important to demagnetize a tape deck head every so often because they can become magnetized from the passage of the tape through the deck. If this happens, your tape player will cause a reduction in sound quality, it can also lead to cassette playback problems, which can cause film inside tapes to get tangled. But this problem can be dealt with cassette demagnetizer, which can be bought from all good audio shops.

Instructions on how to clean a tape deck head using it:

1)Make sure the tape deck is powered on and press down the eject button to remove your cassette.

2)Next insert the cassette demagnetizer into the tape deck and press down the play button.

3)Let the cassette play for 30 seconds and then remove it, by pressing down the eject button.

4)Then store the cassette demagnetizer in the metal shield it came with, this is to prevent the device to erasing magnetic recordings, by accident.
Read More
Posted in | No comments

How To Clean The Head On a Cassette/Tape Player, Using a Head Cleaner

Posted on 03:51 by Unknown

If you get a hissing sound, when your are playing a cassette, through your speakers, there is a likely chance that the head inside the tape player has become dirty. The head can become dirty because you might have inserted old, dusty cassettes into the tape player, causing the dirt on the film to transfer dust onto the head. If the head on your tape player is dirty, then purchase a head cleaner kit. Most kits contain a bottle of rubbing alcohol and a cassette. Once you have bought the kit, follow the instructions provided below:

1)Remove your cassette from the tape player, this can be done by pressing the eject button and using your fingers to remove the cassette out.

2)Open the head cleaner kit packet and get the cleaning liquid solution, it will be in a small bottle.

3)Get a small pin, unscrew the cap and use it to poke a small hole into the top of the bottle.

4)Now get the head cleaner cassette, at the top of it, you will notice a white film, what you need to do is pour the solution on it.

5)Insert the head cleaner cassette into the tape player and let it rewind for 30 seconds and then forward for 30 seconds. While the cassette is forwarding and then rewinding, the film is cleaning the head.

6)Once the clean process it completed, insert your normal music cassette into the tape player and test if the noise is gone. If you can still hear some hissing, apply steps 4 and 5 again.
Read More
Posted in | No comments

Friday, 23 September 2011

How To Make a Non Turbo Charged Car Engine Sound Turbo

Posted on 09:18 by Unknown

If the engine inside your car is a non turbo charged, it means you can't heat sounds that a turbo charged engine can produce, sounds such as a blow off valve blowing off into the atmosphere, or a turbo spool whine or whistle, when the turbo spools up. However, if you can't afford to add a turbo to your ride and still want hear sounds of a turbo on your car, i have some very good alternatives that you will like.


1)If you have a Apple iphone, you can download an application called "iboost". It simulates a blow off sound of a turbo charger, when you drive your car about. All you have to do is buy it from the app store, install it, place the phone into a cradle and place the cradle on your dashboard. Then run the app, connect it to the aux output on your car head unit and enjoy loud blow off valve sounds. Every time you shift up gears, it will create a blow off sound, thanks to the clever accelerometer inside the phone. You can also use this app to hear induction and flutter sounds truly amazing!


2)Install a fake turbo whistler into the car exhaust. It is a simple and affordable device that fits directly into the tailpipe of the car exhaust. When you accelerate your car, the simple device will create a turbo whistling sound, like a turbo is spooling up.
Read More
Posted in | No comments

How To Turn On a Xbox 360 Console With a Controller

Posted on 08:59 by Unknown


If you want to turn on your Xbox 360 console without pressing the down the power button on the front of the console, you can power it on with a controller instead. If you want to power on your Xbox 360 console using your controller, follow the instructions below:

Your Xbox 360 power supply adapter must be connected into a live electrical outlet and connected to your console, for this method to work.

1)Make sure your controller has 2 AA batteries that have battery charge, if it is a wireless controller.
Make sure your controller is has the usb cabled plugged into a spare usb port on the Xbox console, if the control you are using a wired type.

2)Then look on the Xbox 360 controller for the "Guide" button, you will see a circular shape button placed in the middle of the controller, with a "X" shape printed onto it, that lights up green when your power on the controller.

3)Once you have found that button, hold it down for 3 seconds, the Xbox 360 controller will power and the console will power automatically on.
Read More
Posted in | No comments

How To Turn Off a Xbox 360 Console With a Controller

Posted on 08:43 by Unknown

If you can't be bothered to move from your sofa, to turn off the Xbox 360 console, you can turn it off with a controller, without getting up and holding down the power button on the console to turn in off. It simple and easy for you do, just follow the instructions that are provided below:

1)When your Xbox 360 is on, with the controller connecter, hold down the "Guide" button down for three seconds.

2)Look on your television screen, next you have two options to select. Option one, is to power off the controller and the Xbox 360 console. The second  is to power off the controller only, not the Xbox 360 console.

3)Once you have made your mind up on which option you would like to select, press the "A" button on the controller, you know the green colour one.
Read More
Posted in | No comments

How To Fix Charger Not Supported Problem On Your Nokia Mobile Phone, Solutions To The Problem

Posted on 08:16 by Unknown

If you are using a car or home charger, to charge up your Nokia mobile phone and a error message on the screen displays "Charger Not Supported", the battery will not charge up. Basically this message is telling you that the charger you are using to charge up your Nokia mobile phone is not compatible with the battery and the phone. If you get that kind of message displayed on your Nokia mobile phone, try the solutions that are given below to fix this kind of problem:
 
1)Make sure the charger you are using with your mobile phone is a "Genuine" product made by Nokia. If the charger is a fake, that is the reason why your phone that displays the error message. To identify if the charger you are using for your mobile phone is fake, look for any Nokia logos on the outer plastic and on the sticker. If there are no Nokia logos, but the charger has a led light indicator, then it is a fake, so replace it with a original charger and this problem should be resolved.

2)Check the charger, this is by using it on a different Nokia phone to test it. If you get the same kind of error with the second phone, the charger is likely to be faulty, so replace it.

3)If the charger is not the cause to the problem, then i suggest you to to a factory reset on your mobile phone. Sometimes the firmware can get locked up and cause bugs to appear, resetting could solve this problem. A factory reset usually resolves charger not supported problem on the Nokia 6300, 5200, 8800e, 6500, 5800, 6233, 7230 and 3310.

4)There could be a bug in the phone's firmware, so download Nokia Software Updater onto your computer, that has internet access. Then using a appropriate usb cable, connect the phone to the computer, via usb and run the software. If there is no new software update available, choose the option that allows the computer to reinstall the firmware back onto phone. If you don't like to use Nokia's Software Updater software, you can use JAF, and appropriate firmware files to the RM model of your handset, and flash the firmware.

5)The charger block connect could be damaged, for example: this pin inside it can be broken off, causing charging problems. So get a bright torch and shiny it onto the charging block, if it looks worn out, then replace it.

(If none of the solutions work that are provided above, then it is likely to be a component on the circuit board that is damaged, due to a short circuit)
Read More
Posted in | No comments

Tuesday, 20 September 2011

Can You Make a MP3 128 Kbps Into a 320Kbps High Sound Quality File, By Upping The Bitrate, Is It Possible?

Posted on 05:17 by Unknown


There are many people that are asking if they can increase the sound quality in a mp3 file that already has poor bitrate, by upping the bitrate size, using a audio converter.

Yes, you can increase the bitrate size of a mp3 file, by upping it, however you will get no improvement in sound quality, it will just show a high bitrate, in the media player. This is because a low bitrate mp3 file has detail that is already lost, if you up the bitrate, were is the audio converter software going to get the extra detail from?, exactly it can't! Once the detail has gone, it has gone, as it is not included in a low quality bitrate mp3 audio file, to keep the size of the mp3 file small. The only way you can retrieve that detail back again, is to rip the audio from the original source, using the maximum supported bitrate for a mp3 file, which is 320 kbps.

So stop thinking you can increase sound, by upping the bitrate because you are wasting your time!
Read More
Posted in | No comments

How To Increase Sound Quality On a Onboard Sound Card

Posted on 04:46 by Unknown

Most modern computers and laptops on the motherboard, have on board sound, sound that is already on the board, so your computer or laptop doesn't require a add on sound card. Most on board sound cards on high end motherboards sound pretty good and is really no better than a additional sound card, unless you have studio headphones or high quality speakers, you can't really tell the difference. However, some people say that the sound quality using on board sound sucks, but with a few tweaks, it can sound just as good as a proper high end sound card.

1)Adjusting the equalizer- a equalizer allows you to control which sound frequencies, the bass, the mid-range and the treble, this is by increasing and decreasing the sliders in each band. Tweaking these can help sound frequencies that lacks. Most on board sound card have preloaded software that has 10 band equalizer and can be found under "Sound, speech and audio devices", under control panel in Windows.

2)High quality sound files- If you are using lossy mp3's that have a maximum bitrate of 128 kbps, then the sound quality of the music itself will sound less detailed. The more the bitrate is, the more detail is in the audio file, so i suggest you to re-rip your music from the original source, using lossless codec called "Flac".

3)Upgrade speakers or headphones- If you are using cheap stereo speakers or headphones, they will deliver poor sound quality, as the drivers are cheaply made. If you want quality in the sound you hear, buy a 7.1 surround sound speaker setup. Or if you want to keep the sound to yourself, by some high end studio headphones.

4)Update the drivers-If your sound car has old drivers, it has old software running on the audio chip, this can also reflect on the sound quality. Every so often, manufactures release latest software drivers, which offers improved or new features and better sound quality.

5)Hardware acceleration-Go into "Control panel", find the sound settings and then look for speaker settings. Go into speaker settings and click onto performance and make sure the audio acceleration playback slider and the sample rate conversion quality are set to the maximum. This is to ensure that you get optimal sound enhancement out of the on board sound card.
Read More
Posted in | No comments

Monday, 19 September 2011

What is Gain Control Setting On an Car Audio Amplifier?

Posted on 08:51 by Unknown

On all car amplifiers, they have a gain that is a small potentiometer that acts as a variable resistor, that you can increase and decrease, using a screwdriver, this is to match the voltage with a car amplifier and car head unit, voltage which is provided by the car head unit RCA voltage, that is provided through the RCA cables into the car amp RCA inputs. The gain level has to match the car head unit and amps voltage, for optimal sound quality and performance. Too much voltage into the car amplifier can lead to sound distortion, a jagged curve on a frequency wave, which can be seen on a oscilloscope, which can cause poor sound quality and could cause damage to the voice coil in speakers or subwoofer, that you are driving on your car amplifier.
Read More
Posted in | No comments

How To Fix a Car Stereo That Loses My Audio Presets Settings

Posted on 08:31 by Unknown

If you have a car stereo that allows you to make your own custom equalizer presets, such as increase and decrease treble and bass and you have fine tuned them, when you turn off your car, does you car stereo lose your presets when your turn the stereo back on?

1)If this is situation, your car head unit is not remembering your presents because the memory wire is not connected with the live wire. The memory wire makes the stereo remember its settings, if that wire is not connected to the live wire, that can be the cause for it to forget them.

2)So to resolve this problem, remove the car head unit from it's din slot and connect the memory wire with the live wire, on most decks the memory wire is coloured "Yellow", to make 100% sure which wire is the memory one on the wiring harness, look for the wiring diagram, it will be noted on there.

3)Next you need to find the live wire, it is always a red colour wire, it should be already connect to a constant 12 volts. So you might need to unwrap some insulation tape from it to get access to it.

4)Once you have found both the live and memory wires, strip of 1 cm of insulation off the memory wire and then connect it to the live wire. Once you have made the connections, using insulation tape, tape up the exposed braid of the wires.

5)Replace the car stereo back into the din slot.
Read More
Posted in | No comments

How To Connect & Hook Up & Setup PC Speakers To a Computer

Posted on 08:19 by Unknown

If you have bought a set of computer speakers and you want to use them with your computer, so you can play games, listen to music or watch movies and hear the sound using them, you will need to hook them up to your computer. A computer has a sound card or on board sound, which is basically electronic components that deliver sound to your speakers. If your PC speakers are stereo ones, in other words there is two speakers, one speaker is left and other one is left, you will need to locate the green colored, a jack socket that provides a input signal to your computer speakers.

1)Finding it is easy, just look at the rear of your computer tower for a green coloured jack, look on the motherboard, or if not found there, look for a sound card fitted into a pci slot. If you don't see it, then your PC doesn't have sound card, so you need to buy one and fit it in, a good sound card for money that i recommend you is called a "Creative blaster", it provides excellent sound quality.

2)Next you want to find the 3.5mm jack, a wire that is sticking out from the speaker housing.

3)Once found, plug the jack into the "Green" jack socket, now your speakers can receive a input signal and amplify.

4)Power on your computer, it should automatically find them and your sound card's menu will pop up. If it does pop up, it will allow you to make adjustment to different sound effect features, this is to allow you to adjust how you want the speakers to sound, most good sound cars these days have a equalizer, this is so you can increase or decrease bass and treble.
Read More
Posted in | No comments

How To Wire a Car Stereo In a House

Posted on 07:49 by Unknown

If you have a spare car stereo in your house, that you don't want to install in your car and you want to connect it in your house, you will require a power supply that can provide constant 12 volts because all car stereos require 12 volts to turn on. Most people use a old or spare computer power supply unit because it can produce 12 volts, you can use it too. Most computer psu's are about 20-25 amps, a car head unit requires about 10 amps, so hooking it to the computer power supply should be fine.

Instructions:

1)Make sure the power is disconnected for the psu, you don't want it on, while you are making connection with the wires, for your own safety.

2)On most computer psu's there are a bunch of different coloured wires, that do different things, the wires that you need to  move out of the way are wires that are blue orange red and green, as it makes it easier for you to strip down all the yellow wires.

3)Once you have done that, find all the yellow color wires and using a wire stripper, strip off 1 cm of insulation off the wires.

4)Then find all the black wires and using a wire stripper, strip off 1 cm of insulation off the wires.

5)Next twist all the yellow wires braids together, making all the yellow wires into one connection. Also do this for the black wires.

6)Locate the wiring harness on your car stereo and find wires that are coloured "Yellow", "Red" and "Black".

7)Once you have found them three wires, strip off 1cm of insulation from all of them, this is so the braid is exposed.

8)Then connect the yellow and red wires together and connect them to the yellow wires on the psu.

9)Then connect the black wired on the wiring harness to the black wire on the psu.

10)Using insulation tape, tape the exposed braids of the wires up, this is to prevent a short circuit to happen.

11)Turn on your computer psu, then press the power button on the car stereo and it will turn on.
Read More
Posted in | No comments

Tuesday, 13 September 2011

How To Make a Car Head Unit Turn On With The Ignition Off

Posted on 11:48 by Unknown

If you have an in car dvd player in your car and want to watch a movie or want to listen to some music, when you turn the ignition off, it is possible. Most car head units have two coloured wires, one wire which is the colour "Yellow", which is the wire that acts as a ignition live and the other wire that is the colour "Red", which acts as a constant live. If you car stereo turns off, when you turn off the car engine, then the yellow wire is not connected with the red wire on the wiring harness and are not connected together to the car's permanent live.

To make your car head unit turn on and off with the ignition off, it involves you to connect both the red and yellow wires together.

1)Remove your car head unit from the car's dashboard, using a flat head screwdriver, push it into each side of the car head unit and pull out the stereo, as an alternative to remove it from your car's dashboard, if you don't have din tools.

2)Once you have removed the car head unit, look for "Red" and "Yellow" coloured wires on the wiring harness.

3)Once you have found both of them, using a wire stripper, strip of 1 cm of insulation off the yellow wire. 

3)Next connect the "Yellow" colour wire from the wiring harness, with the "Red" colour wire and using electrical insulation tape, tape up the exposed braid, this is to prevent the wire from touching other wires and causing a short circuit.

5)Push all the wires that are behind the car head unit, pushing them right back and then insert the car head unit back into the din slot, this is by pushing it in.
Read More
Posted in | No comments
Newer Posts Older Posts Home
Subscribe to: Posts (Atom)

Popular Posts

  • How To Connect Two PS2 Consoles Together Using a iLink Cable/System Link
    The older fat style PlayStation 2 console has a iLink IEEE1394 port, which allows you to use a iLink cable to connect two similar PS2 consol...
  • How To Remove a Stuck Car Cigarette Lighter Thats Jammed In Socket
    A car cigarette lighter is used to light a cigarette. The cigarette lighter works by pushing the button in, when the metal elements found at...
  • How To Delete Game Saves Off a PS1 Memory Card
    A memory card can be inserted into a ps1 gaming console to save game progress you have made in games you play on the console. However, the p...
  • How To Open & Take Apart Sony PS2 Memory Card / PS2 Memory Card Disassembly
    The Sony PlayStation 2 console uses a memory card to store game save data you have created from playing games. Once the game save data has b...
  • How To Insert Micro SD Memory Card In Nokia 5233
    The Nokia 5233 supports a official maximum memory card size of up to 16 GB. The type of memory card that the phone supports is 'Micro SD...
  • How To Open PS2 Fat Disc Tray Without Power Manually
    The original version of the PS2 console uses a disc tray mechanism to load games into the disc drive, similar to how a DVD player works. The...
  • How To Fix a Broken PSP Wlan Switch Thats Not Working
    If the wlan switch is not turning on the Wi-Fi on the psp console, when switched in the on position, there is a problem. Most of the time ...
  • Does The Nokia 5233 Have a WiFi Connection Setting?
    So i just bought a Nokia 5233 and i have a wireless router, can i connect onto the internet using WiFi? Unfortunately, when Nokia manufactur...
  • How To Fix a Soldering Iron Tip Thats Not Melting Solder Wire
    A soldering iron is widely used in the electronics industry to melt soldering wire to create permanent solder joints onto printed circuit bo...
  • How To Fix PS2 Slimline Loud & Noisy Cooling Fan-Make it Super Quiet!
    So why does my PS2 slimline have a noisy fan? The reason why you hear the cooling fan inside your PS2 slimline spinning like crazy is becaus...

Blog Archive

  • ►  2013 (99)
    • ►  November (11)
    • ►  October (3)
    • ►  September (25)
    • ►  August (20)
    • ►  July (30)
    • ►  June (5)
    • ►  May (3)
    • ►  April (2)
  • ►  2012 (41)
    • ►  November (3)
    • ►  October (2)
    • ►  September (8)
    • ►  August (10)
    • ►  July (18)
  • ▼  2011 (366)
    • ►  December (1)
    • ►  October (64)
    • ▼  September (65)
      • How To Stop a House Burglar Alarm That Won't Go Of...
      • How To Save Xbox 360 Games To a USB External Flash...
      • How To Connect 6x9 Speakers To Head Unit, Not To a...
      • Do Subwoofer Enclosure Terminal Cups Melt When It ...
      • How To Clean a Car CD Player Head Unit
      • How To Clean a Car Subwoofer Without Damaging The ...
      • How To Clean a Car Exhaust Muffler Backbox
      • What Does Decat Mean On a Car?
      • What Is a Car Catalytic Converter For?
      • How To Remove a Catalytic Converter From a Car Exh...
      • How to Remove a Car Subwoofer
      • How To Magnetize a Screwdriver Bit Tip Quickly
      • How To Fix Crackling Computer Speakers
      • How To Clean Out & Unclog a Dity Clogged Car Fuel ...
      • How To Stop Your Car From Shaking When at Idle
      • How To Fix a Car Window That is Off Track
      • How To Replace a Cigarette Lighter Socket/Plug In ...
      • How To Fix Nokia N91 Hard Drive Not Available/Not ...
      • How To Fix a Nokia N95 screen with No Backlight
      • What Does Lows, Mids and Highs Mean In Car Audio?
      • How To Make a Slow Sony Ericsson W995 Faster
      • How To Soft Reset a Nokia 5800 To Factory Settings...
      • How To Perform a Hard Reset On a Nokia N91 Phone, ...
      • How To Soft Reset a Nokia N91Phone Using a Reset Code
      • How To Make The Screen Rotate On a Nokia N95 Autom...
      • How To Fix & Repair a Video Tape That Is Chewed Up...
      • How To Demagnetize a Tape Deck Head
      • How To Clean The Head On a Cassette/Tape Player, U...
      • How To Make a Non Turbo Charged Car Engine Sound T...
      • How To Turn On a Xbox 360 Console With a Controller
      • How To Turn Off a Xbox 360 Console With a Controller
      • How To Fix Charger Not Supported Problem On Your N...
      • Can You Make a MP3 128 Kbps Into a 320Kbps High So...
      • How To Increase Sound Quality On a Onboard Sound Card
      • What is Gain Control Setting On an Car Audio Ampli...
      • How To Fix a Car Stereo That Loses My Audio Preset...
      • How To Connect & Hook Up & Setup PC Speakers To a ...
      • How To Wire a Car Stereo In a House
      • How To Make a Car Head Unit Turn On With The Ignit...
      • Car Head Unit Has No Blue Remote Wire, How To Conn...
      • Should I Power My Car Speakers Using a Car Amplifi...
      • Why Does Your TomTom Sat Nav Have The Green Light ...
      • How To Unlock a Car Door With a Cell Phone In Seconds
      • Can You Unlock a Car Door Using a Mobile/Cell Phon...
      • How Often Should You Change Your Air Filter In You...
      • How Often Should You Change Your Car Battery?
      • Instructions on How To Add Wynns Hydraulic Valve L...
      • How To Make Your Car Run Quiter On The Road & Inside
      • How To Fix a CB Radio That Wont Transmit
      • How To Connect a CB Radio To a Home Power Supply U...
      • 6 Great Games Like Mafia 2
      • Forza 4 Crew Record Engine & Exhaust Sounds From R...
      • How To Fix a Nintendo DS Stylus Pen Not Working On...
      • How To Get Revenge On Noisy Neigbours Upstairs Or ...
      • How To Fix a RipSpeed DV720 In Car DVD Player With...
      • Excellent Advice On How To Keep Your Ps3 Console D...
      • How To Fix a Car Head Unit That Cuts Out At High V...
      • Does The Pre Out Voltage On a Car Head Unit Effect...
      • Does It Matter If a Speaker/Subwoofer Has No Prote...
      • How To Remove Car Head Unit Distortion & Increase ...
      • How To Bypass The Handbrake Wire On a In Car Dvd P...
      • Why Is It Important To Internally Brace a Subwoofe...
      • What Is The Difference Between Slot VS Circle/Roun...
      • How To Tell If a Mobile Phone Is Blocked/Blacklist...
      • What Benefit Of Installing Dual Batteries In My Ca...
    • ►  August (41)
    • ►  July (63)
    • ►  June (132)
Powered by Blogger.

About Me

Unknown
View my complete profile