3g Supported Mobile

  • Subscribe to our RSS feed.
  • Twitter
  • StumbleUpon
  • Reddit
  • Facebook
  • Digg

Wednesday, 31 July 2013

How To Format Nokia N95 8GB Phone Mass Memory

Posted on 06:06 by Unknown

Formatting your Nokia N95 8GB mass memory will remove all the current data that is stored onto it, such as applications, games, music, videos or photos. You may want to perform the format if your phone memory is full and you want to get rid of everything that stored onto the mass memory in one go or you are selling your mobile phone to somebody. It is essential that your follow the correct procedure when you are formatting your Nokia N95 mass memory. This is because if you do it wrong, it won't reformat properly and the mass memory will become unavailable or corrupted causing problems. So to prevent that happening, what you need to do is follow the step by step instructions provide below.

1) Press the 'Power' button found on the top of the mobile phone to power on your Nokia N95.

2) Once it is switched on and booted onto the home-screen, press the 'Menu' button to gain access into the main menu.

3) From the main menu, select 'Tools' > 'Utilities' > 'Memory' > 'Options' and finally select 'Format Mass Memory'.

4) A message will appear onscreen confirming that you want to go ahead with the formatting process, select the 'Yes' option to proceed with it.
Read More
Posted in | No comments

How To Make Your Scalextric Car Go Faster

Posted on 02:36 by Unknown

A scalextric slot car works by using the metal track lines that are grooved into the plastic track pieces to gain power. When you place the car onto the track, the two braid brushes underneath the car connect with the metal track lines, creating an complete electrical circuit. So when you press the trigger on your controller, it will send voltage down the track lines that will be transferred over to the cars motor. Racing your friends on a scalextric can be very challenging and you always want to have a faster car than your opponent in a race. If you are want to make your scalextric car go faster, there are numerous things that you can do to your car to increase its performance on the track.

1) Ensure that the silver color braids found underneath the car are not clogged up with hair and dirt. Dirty braid brushes can cause your scalextric car to run slow because the car can't travel along the track smoothly. If you find that they are dirty, carefully using a pair of tweezers pull out the hair. Make sure you only pull out the excess hair and not the little stands of braid because it can damage it. Then using a small cleaning brush, run the brush bristles upwards and downwards onto the braid brushes to remove the excess dirt.

2) Remove as much weight as possible from the car. Excess weight such as the interior in some scalextric cars can cause the car to weigh more, causing performance to decrease when racing on the track. This is because the extra weight puts more strain on the car and makes it harder for the car to accelerate to reach its top speed.

3) Increase the amount of voltage the cars motor receives from the track, by using a more powerful mains DC adapter. The more voltage the motor gets, the faster rpm it will spin, making the wheels of your car run faster. Increasing the voltage can be risky because you could damage the motor from overheating. Although, this can be avoided by replacing the current motor with a more powerful motor. Still you would need to drill a few small holes in the front bumper to increase airflow inside the cars plastic housing.

4) Disconnected the LED headlights on your car. They make look cool in the dark, but they are taking up voltage when in use. This extra voltage that the lights are using can go towards feeding the motor extra power, making it spin faster. To disconnect the lights, all you need to do is turn the car upside, remove the screws from the chassis, remove the plastic housing and using a wire cutter, snip off both positive and negative wires.

5) Lubricate the cogs and axles to make them run more smoothly. Overtime, the cogs and axles will become stiff, making them not work to their full potential. Applying drops of oil, will allow them to become lubricated and will make them mechanically operate smoothly. To perform this maintenance, you will need to turn the car upside, remove the screws from the chassis, remove the plastic housing and apply drops of oil onto all of the cogs and axles you can see.
Read More
Posted in | No comments

Tuesday, 30 July 2013

How To Make Your Portable Speakers Louder

Posted on 04:09 by Unknown

Portable speakers are a great optional accessory to use with your music player to share your music with others and gain better sound quality. Portable speakers work by the music player sending an input signal into the portable speakers. This signal is then send to an internal amplifier that is powered by batteries that amplifies the output signal sent to the speakers, making the speakers sound louder and powerful. If you have some portable speakers and you want to make them sound louder, i have a few clever ways that i want to share with you that can make it possible.

1) Ensure that the volume of the source, i.e. the music player, is set to the maximum level. Setting the volume to the maximum level will allow the portable speakers to get a higher input signal. This means getting more sound from your music player to boost the sound output heard on your portable speakers. This makes your portable speakers sound louder because the amplifier has a bigger input signal to process into sound.

2) Ensure that the batteries used for your portable speakers are not dead. Dead batteries will provide insufficient voltage to power up the amplifier inside the speakers. This means the amplifier will not be performing to its full potential. If you notice that the LED power indicator dims as the bass hits, this is a sign that the inserted batteries are dying and will need replacing with new ones. If portability is not an issue for you, then i would suggest you to forget about using batteries and connect the portable speakers to the mains using the supplied DC adapter. This will always provide constant power and the amplifier will never have voltage issues again.

3) Ensure the equalizer sliders are set to the maximum level. Most music players will have a equalizer feature in the settings, which allows you to increase and decrease certain frequencies to your liking. Since you are trying to achieving maximum SPL, adjusting all the sliders to the maximum level will make your portable speakers sound louder.

4) Use sound booster software to increase the volume level of your music. Boosting the volume of your music files will make them louder than normal. Applying to much boost to your music tracks can cause distortion to be heard, which can cause bad sound quality. So tweak around with different levels of boost in your music tracks to limit distortion.
Read More
Posted in | No comments

Thursday, 25 July 2013

How To Fix & Prevent a Projector From Overheating That Turns Off

Posted on 07:41 by Unknown

A projector is a device that is used to project a picture onto a wall or a plain white sheet. You will see projectors used in gaming and home cinema because they have the ability to provide a large picture in high definitions resolutions. If you have been using your projector frequently, overtime dust will gather up inside the device and onto the cooling filter. The trapped dust will then cause the air flow inside the projector to become suffocated because it can't escape out of the blocked air vents. This can immediately cause the cooling fan to spin really fast and sound loud, it will then cause overheating to occur to your project and it will shut down. All projectors have a built in feature that automatically powers itself off when the internal temperature reaches beyond normal operating temperatures, so don't worry its normal for it to happen. If you have this problem with your projector, giving it a good external clean with a vacuum cleaner will usually fix it.

1) You will need to obtain a household vacuum cleaner, so you can use it to remove the dust found on different parts of the projector. Once obtained, get the vacuum cleaner plug, then insert it into the nearest wall socket and switch it on.

2) Power on your vacuum cleaner, point the nozzle in the direction towards the air vents found on the projector. Most projectors will have numerous air vents placed around all sides of the device, so clean them all. While you are cleaning, the dust will get transferred from the projector and into the hoover bag. When you have finished vacuuming the dust, you can then switch off the vacuum cleaner.

3) Next you will need to clean the internal filter. Overtime, this filter will become clogged up with dust and dirt. The filter prevents the dust and dirt from getting inside the actual projector and instead gets stuck onto the filters foam. So to begin with, you will need to locate the filter on your projector, usually it's on the front side near the bulb. If you can't find it, i would suggest you to read the user manual that is supplied with the projector and have a look to see were the filter is.

4) Once you have found the location of the filter, you will need to remove the filter from the projector. So remove the filter by pressing down the tab. Once the tab is pressed down, the filter will unlock itself from its housing and you can then remove it.

5) Now that the filter is removed, switch on your vacuum cleaner and point the nozzle towards the foam of the filter. Make sure that you cover all areas of the filter and clean around the filter housing where the filter goes into. When you have finished cleaning it, switch off your vacuum cleaner and reinsert the filter back in.
Read More
Posted in | No comments

How To Change & Replace Soldering Iron Tip

Posted on 01:59 by Unknown

The heating element inside a soldering iron heats up the metal tip so it can melt solder wire. Overtime, the tip can become damaged from extensive soldering and will become brittle or melt during the process. If this happens the solder will not stick onto the iron and you can't solder things properly. So you will need to replace the current broken tip on your soldering iron with a brand new replacement tip to fix this problem. You also might want to replace the soldering iron tip, if you want a tip that is a different size, to make soldering electrical components easier to do.

1) Unplug the plug from the wall socket and switch it off. If you have recently used the soldering iron, allow the metal tip to cool down. To check if the tip is cooled down, get some solder wire and touch it against the tip. If the solder wire doesn't melt then it's cool, but if the solder wire does melt it's still hot!

2) On your soldering iron near the metal tip you will see a screw that is in place. This screw holds the metal tip into the soldering iron. Loosening the screw will allow the metal tip to free up. So using a 'Philips' head screwdriver slightly loosen up the screw.

3) Now holding the top part of the current tip, pull it upwards and it will remove itself from the soldering iron. If the tip you have just removed is broken it is useless, so dispose it into a bin. If the tip is still functional and you are only replacing it because of its incorrect size, don't throw it away because it might come in handy for other soldering jobs later on.

4) Then get your replacement tip and insert into the tip hole and push it in all the way down. Then using your 'Philips' head screwdriver, tighten up the screw you loosened earlier on. Give the metal tip a good wiggle to ensure that it is firmly in. If it is loose you will need to tighten the screw a little more tightly.
Read More
Posted in | No comments

Wednesday, 24 July 2013

How To Fix a Broken Soldering Iron Thats Not Heating Up

Posted on 13:08 by Unknown

A soldering iron is a tool that is used to heat up soldering wire to solder electrical connections together. A soldering iron is plugged into the mains, it then operates by heating up the element inside the metal tip and it can reach temperatures of up to 260 C or more depending on how many watts it is. If you your soldering iron is not working and the metal tip is not melting solder wire, its probably the fuse inside the plug that is burnt out. The fuse can burn out if there is a short circuit and it will break the circuit preventing the soldering iron to work. Remember to replace the fuse with a fuse with the exact amount of amps (usually 3 Amps) because it is not safe using a fuse with a different amp rating.

Instructions on how to fix your soldering iron thats not working

1) Unplug the plug from the wall socket and switch it off.

2) Get a 'Philips' head screwdriver and using it, remove the screw in the middle of the plug. You will need to do this because the fuse is located inside the plug.

3) Once unscrewed, turn around the plug and pull the plastic cover off.

4) Using a 'F'lat' head screwdriver pry the fuse out from its holder. 

5) Get your brand new replacement fuse of the same amps and insert it directly into the fuse holder.

6) Replace the plastic cover back onto the plug, insert the screw you removed earlier on and using your 'Philips' screwdriver screw it tight.
Read More
Posted in | No comments

Friday, 19 July 2013

How To Change Langauge Setting On TomTom XL GPS To English

Posted on 01:39 by Unknown

The TomTom can be set to be read in many different types of language, so all cultures can have the ability to use the gps device without having difficulty reading what the text says onscreen. If you have bought a TomTom satellite navigation device from a different part of the world or have bought it second hand from a non UK citizen, the language setting is probably been changed into a foreign language and is not set to read in English. You also might have accidentally changed the language when playing around with the settings. This can cause problems for you because you will not be able to work out how to operate the TomTom making it useless. But since the manufacturer has included a option that allows you to change the current language on your device, you can easily revert it to read back in a English language.

1) Switch on your TomTom by pressing down the 'Power' button for 3 seconds. Once you hear the startup sound and the splash screen image appear onscreen, you can release the power button.

2) Once the TomTom is on the maps screen, tap the touchscreen to enter the 'Main Menu'.

3) From the main menu, find the 'Change Preferences' option and tap it.

4) Once you have entered 'Change Preferences', keep tapping the right arrow found at the bottom of the screen until you find a option called 'Change Language'. When you have found it, tap it to select it.

5) A wide range of different languages will now appear in a list onscreen. Find the 'English UK' language from the list. Since your TomTom is currently in a foreign language, look for the England flag next to the language name to help you identify it easily. If you can't find it on the list, use the down arrow on the right hand side of the screen to bring up more languages.

6) Once you have found the 'English UK' language, tap it to select it. You will also be asked to confirm if you want to change the current voice that is used to guide you on the road. You probably need to change that as well to a English voice, as it very likely that its currently set to a foreign voice.
Read More
Posted in | No comments

Thursday, 18 July 2013

How To Change TomTom Sat Nav Startup Image Splash Screen

Posted on 09:14 by Unknown

Every time your power on your TomTom sat nav, a splash screen with an image will appear for a few seconds and will shortly disappear afterwards. The manufacturer TomTom has set the splash screen image on multiple satellite navigation devices to have TomTom logo branding on them as default from the factory. Some people may find that the default startup image looks boring or uncool, so TomTom have made an option that allows you to change it to a customized one of your choice. You can use any image from the internet that has the same resolution (320x240) as your TomToms actual screen and needs to in either a .bmp or .jpg format. If you use an image that has the incorrect resolution the image will be cut out from the edges of the screen. Also any other image formats will not work in this situation because the device will simply not recognize them.

1) Power on your TomTom sat nav by holding down the 'Power' button to switch on the device. If successful powered on, you will hear the drum theme and will see the current splash screen.

2) Wait for the TomTom to load up the maps. Then touch the middle area of the screen with your finger to access the main menu.

3) From the main menu, find the option called 'Change Preferences' and tap it with your finger to select it.

4) Then find and tap 'Start Up Preferences' and tap 'Done' with your finger. You will see onscreen that you are now asked to change the image used for the startup splash screen. So find the image you want to use in the 'Photo Gallery' and select it. Now next time you attempt to switch on your TomTom you will see your new splash screen image that you have chosen.
Read More
Posted in | No comments

How To Change TomTom Sat Nav Car Icon Symbol

Posted on 01:34 by Unknown

The TomTom sat nav uses a car symbol to represent you as a driver on the map. This helps you see what position you are on the roads while driving. Usually from the factory default settings, the car symbol is a plain and simple blue arrow. If you find that symbol looks boring, you can customize it and change it to a car or a motorcycle. If the existing symbols that are pre-installed onto your TomTom sat nav and not to your liking, you can always download some more icons for free from the internet.

1) You will need to switch on your TomTom, so hold down the 'Power' button for 3 seconds. Once you hear the drum start up sound the TomTom is switched on and you can let go of the power button.

2) Wait for the TomTom to load the map up. Then touch the middle of the screen to enter the 'Main Menu'.

3) Then using your finger select 'Change Preferences' and select 'Change Car Symbol'.

4) The screen will now display numerous cars symbols that you can choose from. Tap the 'Down' arrow on the right side of the screen to view more car symbols.


5) Once you have chosen the car symbol you want to use, select the one you like by touching it and it will now appear on the map.
Read More
Posted in | No comments

Wednesday, 17 July 2013

How To Connect Nokia N8 To TV Without Using HDMI Output Cable

Posted on 00:57 by Unknown

If you have a Nokia N8 smartphone and you want to share your photos & videos together with your family on your television, you will need to connect it to your TV. This process works by the smartphone sending a video output signal through the cable and into your television. Most modern televisions that are manufactured today support HD resolutions that the Nokia N8 can output. But if you still have an old CTR telly in your living room, you can still connect your Nokia N8 to the TV without using a HDMI output cable. Instead you can use the standard Nokia CA-75U AV TV output video cable that is used for older mobile phones such as the Nokia N95, N97, 5800 and X6. Using that cable works great, the only different would be the picture that is outputted onto your television screen would not be in high definition resolution.

1) The Nokia CA-75U AV TV output video cable will have three different color RCA plugs, red, white and yellow. The stereo sound is send through the red and white RCA plugs and the video signal is sent through the yellow RCA plug. Look at the back of your television and find the same color RCA sockets. Then connector all three RCA plugs into the RCA sockets matching the same color coordination, so for example the red RCA plug will go into the red RCA socket and so on........

2) Then on the other end of the Nokia CA-75U AV TV output video cable you will find 3.5mm jack, similar looking to what you find on your pair of headphones. Get this jack and connect it directly into the 3.5mm socket found at the top left hand side on your Nokia N8.

3) Once you have made both connections the Nokia N8 will now be in TV output mode. If there is no picture on your TV, then using the remote control keep switching different AV modes until your find the AV your phone is connected into.
Read More
Posted in | No comments

Tuesday, 16 July 2013

How To Transfer PSP Game Saves onto Another PSP Memory Stick Without Using a Computer

Posted on 03:18 by Unknown

When you want to save the progress you have made in a PSP game, the console with create a game save file into the 'SAVEDATA' folder, onto the inserted memory stick. So next time when you want to play the same game, you can load the game save and it will resume the progress you have made earlier on. If you have made some remarkable progress in games and have put in some serious hours playing them, you might want make a back up of your valuable game saves onto another PSP memory stick. Backing up your PSP game saves is essential because the console sometimes corrupts these files, leaving you with a none functional game saves that won't load. If your game save actually does get corrupted and you have already made a back up of it, you can easily recover it. All you got to do is simply pop in your other memory stick and restore the game save onto the console.

1) Power on your PSP console by flicking the 'Power Switch' upwards.

2) Once the console has booted onto the XMB menu, go to the 'Game' option.

3) Press the 'Down' button found on the d-pad to navigate through the different options. Stop navigating until you find 'Saved Data Utility'. Once you have found that option, press the 'X' button to select it.

4) Using the 'Up' and 'Down' buttons found on the d-pad, navigate through your different PSP game saves that are on the current memory stick. Find the game save you want to transfer onto another PSP memory stick. Once you have found it, select it and press the 'Triangle' button.

5) There will be a multiple options onscreen on the right corner. The option that you want to select is 'Copy'. Find it and select it by pressing the 'X' button.

6) A message will appear 'You will be asked to change the memory stick 1 times. Press the X button to begin'. So press the 'X' button. Then remove the current memory stick that is inserted into your PSP console. 

7) Insert your second memory stick into the PSP console. Then press the 'X' button and the PSP console will precede with copying over the game save onto this memory stick. Once the copying has been completed, you can switch over the memory sticks.
Read More
Posted in | No comments

Sunday, 14 July 2013

How To Properly Clean a TomTom Screen Without Scratching It

Posted on 02:22 by Unknown

The TomTom GPS sat nav requires the use of your fingers to navigate through the different system menus. Overtime, the TomTom touchscreen will become dirty, it will have greasy finger prints and smudges on it. This will not affect its performance in anyway, but when using your TomTom in direct sunlight, it can cause difficulty to see what the screen is actually displaying. Also if you are selling your TomTom, cleaning the screen will make it look in better condition and will increase the chances of it being sold onto the new owner. To clean your TomTom screen without scratching it, you will require a soft microfiber cloth. This type of cloth has special fibers that are really soft, unlike a regular tissue paper that has ruff fibers.

1) You will need to get hold of a bottle of rubbing alcohol. This is a special cleaning solution that contains no strong chemicals that works wonders when it comes to cleaning screens. You can purchase rubbing alcohol from any drug store.

2) Press the 'Power' button down for 3 seconds on your TomTom to turn it off. This is to prevent any electrical damage occurring when you are cleaning the device.

3) Unscrew the cap of the rubbing alcohol bottle, get your microfiber cloth and pour a sensible amount of liquid on it. Then screw the cap back onto the bottle.

4) Using the side rubbing alcohol is applied onto the cloth, gently wipe the TomTom screen upwards and downwards covering all areas. Remember not to wipe the screen clean using a circular motion because it will cause visible scratches to appear.

5) Once you have cleaned the TomTom screen, it would be ideal if you apply a peel on screen protector onto the actual screen. This is because the screen protector will protect the actual screen from getting scruffs and scratches from everyday use.
Read More
Posted in | No comments

Saturday, 13 July 2013

Can You Play & Watch DVDs On a Orginal Old Xbox Console?

Posted on 02:35 by Unknown

The Xbox was Microsoft's first generation gaming console and was released in 2001 for North America and in 2002 for both Japan and Europe regions. The games that are created for use with the Xbox console are burned onto dual layer DVD discs. So technically, the Xbox disc drive does have the ability to read any discs that are DVD based. Which is why the Xbox console has DVD playback integrated into the system, so you can use it to DVD watch movies without the need of a separate DVD player in your household. 

Even though the Xbox console does have the functionality to play DVD movies, but in order to make the console make use of it, you will need the optional Xbox DVD Movie Playback kit. The kit costs around £5 and contains a remote control, along with a infrared sensor for use with the Xbox console. Without the Xbox DVD Movie Playback kit, DVD movies will not play be supported by the Xbox console and will come up with an onscreen error. Setting up the Xbox Movie Playback kit on your Xbox console is a straightforward process and will only take a couple of minutes.

Instructions on how to setup a Xbox DVD playback kit

1) Remove the battery lid from the DVD playback remote control. Insert two brand new AAA sized batteries into the battery compartment with correct positive and negative polarity. Inserting the batteries the wrong way round will not make the remote control function, so get it right the first time.

2) The infrared sensor is required so the DVD playback remote control can function with the Xbox console. The infrared sensor also contains a special chip that makes the Xbox console support DVD movie playback. So connect the infrared sensor that is supplied with your Xbox Movie Playback kit into any available controller port found on the front of your Xbox console.

3) Press the 'Eject' button on the Xbox console to eject the disc tray out. Then insert a DVD movie of your choice into the disc tray and press the 'Eject' button again to close it. The Xbox console will now load the DVD movie and will automatically configure the remote control with your console. You will then able to use the DVD playback remote control to navigate through the DVD menu and use its other functions.
Read More
Posted in | No comments

Thursday, 11 July 2013

How To Factory Reset a Nintendo 3DS/XL System To Factory Settings

Posted on 03:35 by Unknown

What Does a Factory Reset do?

If you own a Nintendo 3DS handheld gaming console and you want to sell it on to a shop, you probably wanting to restore the system to factory settings. Resetting your Nintendo 3DS console will revert all of the settings and changes you made to the system back to factory default. It will also clear all data on the Nintendo 3DS that is stored onto the internal memory. Resetting the Nintendo 3DS console cannot be undone once performed on the console and you can't retrieve the existing data that is lost during the factory reset. So it would be ideal for you to back up your important data, such as game saves and downloadable games onto a external memory card before performing the factory reset.

Instructions on How to Reset your Nintendo 3DS/XL to Factory Settings

1) Power on your Nintendo 3DS console by pressing the 'Power' button. 

2) Now from the home menu go to 'System Settings'.

3) Then go to 'Other Settings' and select 'Page 4'.

4) Then finally select 'Format System Memory' and proceed with the factory reset.
Read More
Posted in | No comments

Wednesday, 10 July 2013

How To Make PS1 Controller Work On a PS2 Games Console

Posted on 06:01 by Unknown

So Does the PS1 controller work on a PS2 console?

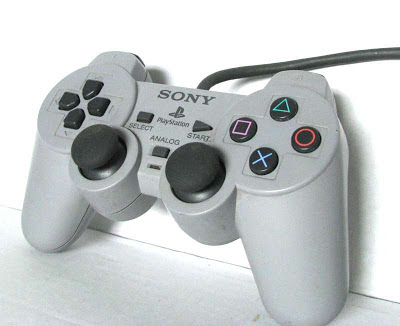
The PS1 gamepad controller has the same button and analog stick layout as a PS2 dualshock 2 gamepad controller. If you put them side by side, they look almost identical to each other, the only difference would the PS2 controller is a black color. The PS1 controller has the same controller port and pinout as a PS2 controller, so technically if you plug it into the controller port on your PS2 console it will work. Using a PS1 controller on your PS2 console will certainly allow you to use it to play PS1 games. If you decide to play PS2 games using the PS1controller you have plugged in, most games will allow it to function with the game, so it will work. However, some games don't have backwards compatibility with PS1 controllers and will only support PS2 controllers, since the PS1 controller doesn't support dualshock 2 vibration technology.

Instructions on How to connect PS1 controller to a PS2 console

1) Turn off your PS2 console by holding down the 'Reset' button for 3 seconds. This will put the console into standby mode.

2) Get your PS1 controller you want to connect into your PlayStation 2 console. Now you will need to find the PlayStation controller's plug. It is a chunky square bit of plastic that is found at the end of the controller cord. This plug connects into the controller port found on the PS2 console

2) Your PS2 console will have two controller ports integrated into the system, which will allow you directly connect a maximum of 2 controllers. Decide which controller port you want to connect your PS1 controller to. If player 1 is going to use it, connect it into controller port 1, if player 2 is going to use it, connect it into controller port 2. So connect your PS1 controller to a controller port of your choice, by inserting the PlayStation controller's plug into the port.

3) Once the controller is connected into a controller port, press the 'Reset' button on the PS2 console and it will power itself back on. If the PS1 controller is connected properly, the red color analog led will light up.
Read More
Posted in | No comments

Tuesday, 9 July 2013

Can the PlayStation PSP Vita Play & Watch YouTube Videos?

Posted on 03:45 by Unknown

The PSP vita is todays most popular portable handheld gaming console that allows you to play your games on the move. The PSP vita also includes an internet browser integrated into its operating system that allows you to browse the internet, just like you would using a desktop computer. Thanks to the large 5 inch OLED multitouch display, the PSP vita has great potential to watch videos in superb high definition quality. So you have probably already tried to play a YouTube video on your PSP vita using the internet browser and had probably no success. If your PSP vita is on a system software firmware version below 2.12, the internet browser doesn't support content that requires a flash player plugin. So YouTube videos will not play directly from the YouTube website using the internet browser, since there is no flash player support.

A lot of people on the forums on the internet starting to question why the PSP vita has a great internet browser, but is lacking flash player support. Since you couldn't steam YouTube videos directly from the YouTube website, unless you have a YouTube Application from PSN store installed onto your PSP vita. Well Sony has now realized that gamers want to stream YouTube videos directly from the YouTube website. So in the recent system software update 2.12, they have included a flash player plugin for use with the internet browser.

If you PSP vita can't currently stream YouTube videos directly from the YouTube website, using the internet browser, then it's very likely that your system software version is below 2.12. So you would need to update the system software version to 2.12 or above if released in the future to benefit from the integrated flash player support in the internet browser. The easiest way would be to connect your PSP vita to a WiFi access point and let the console download and install the system software update for you.

Instructions on how to update system software on your PSP vita using WiFi

1) Plug in your charger into your PSP vita and switch it on. This is because you don't want the battery to finish during the update. Now go ahead and power on your PSP vita console by pressing the 'Power' button down.

2) Using the multitouch screen find and select the 'Settings' option.

3) Then select the 'System Update' option and then select the 'Update Using WiFi' option. The PSP vita will now search for the available wireless access points around it, so it can connect onto the internet to download the latest firmware update from Sony. Select your WiFi access point from the list, enter your password if required and select 'OK'.

4) Your PSP vita will now be connected onto the internet. All you need to now do is carefully follow the step by step on screen instructions. The PSP vita will first confirm the update with you, then download the update directly from Sony and finally automatically install it onto the PSP vita.
Read More
Posted in | No comments

Monday, 8 July 2013

How To Open PS2 Fat Disc Tray Without Power Manually

Posted on 09:05 by Unknown

The original version of the PS2 console uses a disc tray mechanism to load games into the disc drive, similar to how a DVD player works. The fat PlayStation 2 consoles requires power to eject and remove a game from the disc tray. This is because it has a eject button that is connected to a motor that ejects the disc tray out and for that motor do work, power is required. If you have a newer PS2 slimline console, you can manually remove the game disc from the console without the need of any power. This is because instead of using a disc tray, the slimline model uses a spring loaded system that pops open the disc tray flap. Even though power is required to remove a game disc from a fat PlayStation 2 disc tray, you can dissemble part of the console and remove the disc yourself. This can useful if you want to remove your game disc from a dead ps2 console that is not working.

Instruction on How To Open a PS2 Disc Tray Manually

1) Disconnect all wires that are connected to the PS2 console, power wire, AV wire and controller. Also remove any memory cards from the system. You will need a small flat head screwdriver. Turn your PS2 console upside down and using the screwdriver remove all of the plastic and rubber tabs.

2) Once all of the tabs have been removed, using a Philips head screwdriver unscrew all of the Philips screws. Put the tabs and screws in a safe place where they can't be misplaced, as you will be needing them again when you close your PS2 console back up.

3) Then turn the PS2 console around and using your hands push the top of the PS2 console upwards. The PS2 top panel will now come off, slowly place it down on your right hand side. You will see a silver foil ribbon cable that is connected from the motherboard to the power and eject buttons in the top panel you have just removed. Be careful you don't pull it out when handling the console.

4) Using a small sized Philips head screwdriver, unscrew the four small Philips screws found on the plastic cover of the DVD disc drive. Once all four screws are removed, put them with your other screws and tabs you removed earlier on.

5) Pull the plastic disc tray cover upwards and it will remove itself from the DVD disc drive. You will now be able to see your game disc that is stuck inside the PS2 console disc tray. Using your finger nails, grip the disc from all angles and carefully pry it out of the disc tray.
Read More
Posted in | No comments

How To Turn On a ATX Computer Power Supply Without Motherboard

Posted on 02:57 by Unknown

A computer power supply unit convents mains AC voltages to DC voltages to provide power to internal hardware found inside a computer. A computer power supply unit looks like a square metal box and is usually found mounted at the top, inside a computer case. Computer power supply units come in different watts, the more watts they are rated at, the more amps it can provide to internal components found inside your PC. This also means more consumption in electricity. A computer power supply unit also provides multiple 12 V, 3.3 V and 5 V rails, to provide different voltages for different types of hardware. A computer power supply constantly works hard to provide your PC with power, which creates lots of internal heat to build up inside. This is why you will find an exhaust cooling fan located at the back, which allows the PSU to get rid of the heat inside because the fan blows the hot air out. This makes it run at a cooler operating temperature and increase its lifespan.

If you have a PC ATX power supply and you don't have a actually computer with a working motherboard, you can still start it to see if its powers on. On the ATX 24 pin plug connector that connects into the motherboard, there is a green wire that triggers the PSU to power on. If you connect the green wire with a black ground wire you can turn on the ATX power supply unit without a motherboard. This is because the computer power supply unit thinks that you are pressing the power button on the front panel of your PC.


How To a Test Computer Power Supply Using a Paper Clip

1) Your PSU will have a bunch of different color wires that all have a different role. The wire that you will need to locate is the 'Green' color wire. There is only one wire that is that color so it should be fairly easy for you to find. Trace this wire down right to the ATX 24 pin connector.

2) Once you have found the green wire on the ATX 24 pin connector, above the green wire's pin, there should be a black wire. This black wire is a ground wire and you will need it to jump start your PSU.

3) Next get your paper clip and bend it into a U shape so it has two ends. Insert one end of the paper clip into the green wire's pin on the ATX 24 pin connector. Then insert the other end of the paper clip into the black wire's pin on the ATX 24 pin connector. This will bridge a connection between both wires without the need to cut the wires from the connector and join them together.

4) Insert the power cord into your PC power supply unit, insert the plug into a wall socket and turn it on. Next flick the power switch found on the back of the PSU into the 'On' position and it will attempt to power itself on. If it's successfully turned on, the cooling fan will spin and you will able to hear it. If the PSU fails to power on in this test, it is faulty and needs to be replaced with a new one.
Read More
Posted in | No comments

Sunday, 7 July 2013

How To Burn In JVC HA-FX1X Xtreme Xplosive In Ear Canal Headphones

Posted on 12:59 by Unknown

Overview of the JVC HA-FX1X Xtreme Xplosive In Ear Canal Headphones

The JVC HA-FX1X Xtreme Xplosive is a great budget basshead in ear canal headphones that produce tremendous amounts of subwoofer bass, thanks to the 10mm large neodymium drivers and the deep bass ports. The JVC HA-FX1X can be bought around £20 in most shops these days and clearly outperform many other iem headphones in a similar price range in terms of bass. These headphones have a frequency response from 5-23,000HZ, which means that these have the ability to reproduce very low deep subwoofer bass. This making them highly ideal if you listen to rap and hiphop music genres. The headphones also have a low ohm impedance of just 16 Ohms, so you can drive these headphones on a regular iphone, ipad or ipod, without the need of a powerful headphone amplifier.

What will burn in do to my pair of headphones? 

The JVC HA-FX1X headphones are known to have harsh sounding highs on loud volume, that sound ear piercing straight out of the box. Listening to your headphones overtime will make the driver diaphragm looser, during the process the harsh sounding highs will become smoother and less noticeable when listening to your music. But noticing the burn in on your pair of JVC HA-FX1X in ear headphones is going to take a very long time to occur with normal listening. That is why i have come up with a brilliant way to burn them in nonstop continuously for 60 hours.

1) You will need a music player for your headphones that you don't need for at least 3 days. It could be your spare mobile phone or mp3 player. You will also need a charger for your music player because it will be continuously playing music for 3 days nonstop. The device has to have some music stored onto its memory, the type of music really doesn't really matter.

2) Plug in your JVC HA-FX1X 3.5 mm headphone jack into the 3.5 mm socket found on your music player. Then plug the charger into a wall outlet socket and plug the charger connector into the music player. This will provide constant power to the music player, since the internal battery will not have sufficient battery capacity for this 3 day operation. Ensure that both the headphone jack and charger connector is firmly connected into the music player. This is because loose connections can cause an interruption during the burn in process.

3) Select any music track on your music player, set it on repeat and set the volume level to the maximum level. The reason why the volume level has to be set on maximum level is because the louder the headphones play the music, the quicker they are going to get burned in. This is because the driver diaphragms move more aggressively with the music at full volume.

4) Leave your music player playing music constantly for 3 days. You might want put the music player and the headphones in a cupboard to minimize sound leakage if you finding it annoying. After 3 days, your JVC HA-FX1X headphones will have properly burned in and the harshness of the highs will have disappeared.
Read More
Posted in | No comments

How To Connect PS2 EyeToy Camera To PS3 Console Using USB

Posted on 03:33 by Unknown

Along with the PS2 console, in October 2003 Sony released the EyeToy Camera for use with particular EyeToy compatible games such as EyeToy Play, EyeToy Groove, The Sims 2 and SingStar. The EyeToy uses just one connection to make it functional with the PS2 console, which is through USB. Once the USB connector is plugged into a USB port found on the front of your PS2 console, it will power on and will automatically link the EyeToy Camera to your PS2. If you have a PS3 fat console that has backwards compatibility with PS2 games, you can also plug in your PS2 EyeToy Camera and it will still work. This is because the PS3 also supports USB connections, just like the PlayStation 2 did. Not only can you use it for PS2 compatible EyeToy games on your PS3 console, you can also use it to video chat with your friends online on PSN, since it has an integrated microphone.

1) Power on you PS3 console by pressing the 'Reset' button, the LED indicator will turn green. Press the 'Eject' button, remove the game disc that's already in the disc drive and replace it with an EyeToy compatible game.

2) The EyeToy camera has a wire attached to it, thats found at that back of it, which has a USB connector at the end of it. Locate the available USB ports on your PS3 console, they will be found on the bottom left side of the console. Once you have found a USB port that you are not using, insert the USB connector of the EyeToy camera into it. If connected properly, a blue color LED indicator found on the EyeToy camera will light up.

3) Next you will need to position your EyeToy camera by placing it on top of your television at a good angle facing you. Then stand back from your television 5 to 7 feet away and using the EyeToy compatible game, adjust the different camera angles until you find the sweet spot.
Read More
Posted in | No comments

Saturday, 6 July 2013

How To Remove a Stuck Car Cigarette Lighter Thats Jammed In Socket

Posted on 15:45 by Unknown

A car cigarette lighter is used to light a cigarette. The cigarette lighter works by pushing the button in, when the metal elements found at the bottom are heated up, the lighter will pop out of the cigarette lighter socket. You can then pull it out and use the end of cigarette lighter to light up your cigarette. If you push down the button on your cigarette lighter in your car and it doesn't pop out after a couple of minutes, then it is likely to be a faulty spring inside it. The cigarette lighters spring is probably broken or worn out, due to wear and tear over the years of it being used. This can also be a problem for non smokers because you can't remove the cigarette lighter and insert your mobile phone or sat nav charger into it. Usually, replacing the broken cigarette lighter with a new one will fix this problem. But first you will need to remove the current broken cigarette lighter thats stuck in the socket.

1) You will need to turn off the car's ignition. This is to cut the power going to the cigarette lighter, ensuring that it is safe for you to poke and prod the cigarette socket with a screwdriver and so you don't short circuit anything.

2) You will need to insert a small flat head screwdriver into the gap around the cigarette lighter and socket. This will loosen up the cigarette lighter from the socket and will make it easier to remove it manually. Once the screwdriver is inserted you don't need to remove it at this stage.

3) Holding the top part of the cigarette lighter, keep twisting it slowly clockwise and pull it outwards until it gradually becomes detached from the cigarette lighter socket.

4) Once the faulty cigarette lighter is removed from the cigarette socket, remove the screwdriver you inserted earlier on and remember not to throw the faulty cigarette lighter away just yet. You can now go ahead with ordering a brand new replacement cigarette lighter and fitting it into the socket. Use the broken cigarette lighter as guidance to identify the correct one required for your car at your local autoparts store.
Read More
Posted in | No comments

How To Fix a Car Cigarette Lighter That Keeps Blowing a Fuse

Posted on 01:41 by Unknown

A cigarette lighter in a socket is handy to have available in your car, especially if you're a smoker you don't have a lighter and you want to light your cigarette. Also you can remove the cigarette lighter from the socket and use it as a 12v power outlet to charge your mobile phone or sat nav. If the cigarette lighter socket in your car doesn't work, you probably already have replaced its blown out fuse with a new fuse of the same amps. If you notice that every time you start your car and the cigarette lighter fuse keeps blowing, inserting another new fuse is not going to fix this problem, you will just be wasting more and more fuses overtime. The reason why the cigarette lighter socket is blowing out the fuse is because something along its lines is shorting out. The fuse is put in place in the circuitry of the cigarette lighter socket to protect the wiring from melting down and causing an electrical fire.

There are many possible reasons why the car cigarette lighter keeps blowing fuses. It could that the wires that are connected to the rear of the socket could be touching each other. Or if there is broken crud or metal trapped inside the actual socket. Both are possible ways that can cause a short circuit in the wiring.

Method 1: removing the cigarette lighter socket and inspecting the connections

1) With the key in the ignition power off the car. This is because even though the cigarette lighter socket is not working, power could still be running to it.

2) Usually in most cars, the cigarette lighter socket is held in place by two metal clips on each side of the socket onto its plastic housing. You will need to push the clips in to remove the cigarette lighter socket, so get hold of two same size flat head screwdrivers.

3) Remove the ashtray, so you can easily see the two metal clips and insert both flat head screwdrivers into the two metal clip.

4) Then gradually push the screwdrivers inwards and the cigarette lighter socket will pry out of its plastic housing. 

5) Once the cigarette lighter socket is removed, have a good look at the wiring on the back of it. You will find two metal blade connectors that are connected to two wires. These wires provide the 12volts to the cigarette socket. Ensure that both blade connectors are not touching each other and the wires are securely connected to their blade connectors.

Method 2: cleaning the cigarette lighter socket

1) Try cleaning the cigarette lighter socket internally. Get hold of an old toothbrush and a can of WD40 multipurpose lubricant.

2) With the key in the ignition power off the car. This is because even though the cigarette lighter socket is not working, power could still be running to it.

3) Look for any objects that could be trapped inside the cigarette socket, if you find any remove them. Things like foil wrappers or 1ps coins sitting inside the socket can cause a short. Then get your can of WD40 spray, attach the straw that came with it and spray directly into the inside of the cigarette lighter socket.

4) Using the toothbrush, give the cigarette lighter an internal clean. Scrub the toothbrush on the metal contacts you see inside the socket. Keep scrubbing until the color of the metal contacts become clean and dirt free.
Read More
Posted in | No comments

Friday, 5 July 2013

How To Find Out & Check My PSP Firmware Software Version

Posted on 13:34 by Unknown

The PSP console runs on a software operating system, which runs on a particular official firmware version out of the box. Every so often, the developers at Sony will release newer firmware versions that you can download for free on their website and install onto your PSP console. Newer firmware versions always include performance improvements and newly added features, which previous firmware versions don't include. So to ensure that your PSP console is running the latest firmware version, firstly you will need to identify what the current firmware version it is running on. That way you can work out if the current firmware version on your PSP needs to be updated or not.

 Instructions on How To Identify Your PSP Firmware Version

1) Power on your PSP console by flicking the power switch upwards. Wait for the PSP console to boot onto the XMB menu.

2) Using the left button on the D-pad, navigate through the XMB menu and go to 'Settings'.

3) Once the XMB menu is on 'Settings', using the down button on the D-pad, scroll through the different options until you find 'System Settings'. Once you have found 'System Settings', press the 'X' button to select it.

4) Using the down button on the D-pad, scroll through the different options until you find 'System Information'. Once you have found 'System Information', press the 'X' button to select it. The PSP  screen will now display information based on its mac address, system software firmware version and nickname.

Read More
Posted in | No comments

How To Format Your PSP Memory Stick On a Computer (PC)

Posted on 06:26 by Unknown

Applying a reformat to your psp memory stick will permanently erase all of the data that is currently stored onto its storage capacity. You may want to format your psp memory stick if you want to optimize its performance and remove corrupted data that you manually can't delete off it. There are many different methods available to format your psp memory stick, but the most ideal would be to format it using a computer. This is because it gives you full control and provides more formatting options. Remember to backup important data that is currently on your psp memory card you want to format, data such as game saves, music, photos and video files. This is because they will be permanently gone when formatted and you will not be able to retrieve that data when a format is completed.
So how do i format my PSP memory stick using a PC?

1)  Remove your psp memory stick from your psp handheld console. So using your finger,  pull out the tab that covers the memory card,  press the memory card in and it will click out of its slot.

2) Insert the memory stick that you have just removed into the memory card reader found on the front panel of your computer. 

3) Open 'My Computer' and find your psp memory stick, it will be under 'Devices with Removable Storage'. Once you have located it, using your mouse select the memory stick, right click and select the 'Format' option from the drop down menu. 

4) A formatting tool will appear onscreen, ensure that the 'File System' option is set to 'FAT 32'. Also ensure that the 'Quick Format' option is unchecked. Then click onto the 'Format' button, the formatting software will now begin to format all of the data found on the memory stick. 

5) When the format on the psp memory stick is finished, a message will appear 'Format Completed'. You can now remove the psp memory stick from the PC's memory card reader and reinsert it back into your psp console.
Read More
Posted in | No comments

Thursday, 4 July 2013

How To Connect & Setup Chatpad To Xbox 360 Controller

Posted on 13:25 by Unknown

Microsoft has released the official chatpad, a keyboard attachment that you connect directly onto the Xbox 360 controller. With using a chatpad, you no longer need to use the buttons found on the Xbox 360 controller, you use the keys on the chatpad to type. This product has many great online reviews simply because it makes text input quicker and easier when messaging friends on Xbox live and redeeming Microsoft points codes from scratchcards. The chatpad is available to purchase in black and white colors, so you can have a chatpad that matches the color of your Xbox 360 controller. The chatpad is also compatible with both wired and wireless types of Xbox 360 controllers.

Instructions on how to connect your chatpad to a Xbox 360 controller

1) If the Xbox 360 controller is powered on, you will need to turn it off. This is ideal because you don't want random keys on the chatpad being entered and being sent to your friends on Xbox live.

2) The chatpad will need to be installed at the bottom of the controller. So get the Xbox 360 controller and align the chatpad's connector plug with the socket used for a headset.

3) Holding the Xbox 360 controller, push the chatpad in the upwards directions, until it snaps together with the controller. Once it is snapped in, you will hear a click sound, this means that the chatpad is  locked in and connected.

4) To test if the chatpad is working, power on your Xbox 360 controller. If the backlight on the chatpad lights up the keys, then it is functional. If no backlight is seen, the chatpad is not working, so ensure that the chatpad is properly connected into the controller by pushing it further in. If that doesn't work, then remove the chatapad and reinsert it back onto the controller.

5) If you use a headset to talk to friends on Xbox live, then there is a socket found on the bottom of the chatpad, so you can still use it. So plug the headset jack into the headset socket when you want to use it.
Read More
Posted in | No comments

How To Fix Smoke/Fire Alarm Detector Beeping Chirping Problem

Posted on 02:36 by Unknown

A fire alarm is mounted in various locations in your house and they have the responsibility to monitor the environment 24/7. If there is actually a fire taking place, the sensor will pick up the smoke and will alert you with siren sound. This will make you aware that there is a fire and you can immediately take action.

If you installed a smoke alarm in your house and the siren keeps making either a constant beeping or chirping sound every 30 seconds, then the smoke alarm itself needs a service. If your smoke alarm is a battery powered, i strongly suggest you don't remove the battery from it. Yes, it will permanently stop the beeping or chirping sound, but the smoke alarm will no longer be functional and your life could be at risk if a fire does actually break out in your home.

1) You will need to replace the current battery in the smoke alarm with a brand new battery of the same size, usually it is a 9V square battery. This is because the smoke alarm makes chirp sounds to inform you that the battery is on its way out and needs replacing. Try to avoid them kind of batteries from cheap manufactures like powercell, they offer more batteries for less, but the battery life doesn't last long as it should. This is because they are cheaply made and you would probably be replacing the battery again after 4 weeks of use.

2) You will need to open the smoke alarm. No tools such as screwdrivers are required, simply pull the smoke alarm hatch down. Then locate the battery inside the smoke alarm, remove it and dispose it into a bin.

3) Get your new battery and insert it into the battery holder, ensuring that the battery is inserted the correct way. If the battery is fitted into the smoke alarm with reverse polarity, + and - the wrong way around, then the battery won't provide power to it and the smoke alarm will not function.

4) Once the battery has been installed correctly, close the smoke alarm hatch. To ensure that the new battery fitted into the smoke alarm is providing power, test the smoke alarm by pressing the red color 'TEST' button on it. If the smoke alarm is working, it will make a beeping or chirping sound for about 10 seconds.
Read More
Posted in | No comments

Wednesday, 3 July 2013

How To Fix Pioneer Headunit RCA Preout Buzzing Noise Problem

Posted on 13:44 by Unknown
Overview of this particular problem

If you own a Pioneer headunit and you experience buzzing static interference sounds in your car audio system, from the speakers or subwoofer, which is connected to your amplifier, then you need to do something about it. If you are using good quality RCA cables, with good amount of shielding on them and the 12 volt power and RCA leads are running down separate sides of the car, it is probably not engine noise or alternator whine.

If you own a Pioneer stereo, it is most likely it being the cause to you hearing the buzzing sound. Pioneer stereos are common to be the cause of buzzing to occur because of the pico micro fuse soldered onto the circuit board tends to blow out easily. The pico micro fuse usually blows out because of unplugging or plugging in RCA leads into the RCA preouts found on the headunit, while it is turned on. There is no real fix besides replacing the actual micro fuse, but there is a temporary DIY way to fix this problem.

So how can i fix this annoying preout buzzing noise?

The best possible way to overcome this problem is by grounding the shields on the RCA  preouts you are using for your car amplifier, grounding them directly to bare metal onto your cars chassis. This will trick the Pioneer CD player into thinking that the pico micro fuse is still functional and usually will get rid buzzing sounds you hear.

1) Power off the stereo and using a flat head screwdriver, remove it from the din slot in your car. Since you will be needing access to the RCA connections, which are only found at the rear of the headunit. Remember that you don't need to unplug the car amplifier RCA leads from the RCA preouts found on the headunit.

2) Get hold of some thick speaker wire that is around 10 gauge in size because that type is the most sufficient to provide a good quality ground. If you don't have 10 gauge speaker wires available, similar sized wire would still be just as good. You will be needing two speaker wires for one pair of RCA preouts.

4) Using a 'wire stripper' tool, remove about 1 cm of plastic outer-coating insulation from one end of the speaker wire. Then strip of 5 cm off the other end of the speaker wire, this side will need to have more copper braid exposed, since you are going to wrap it several times around the RCA shields. Repeat this procedure for the second speaker wire.

5) The side of the speaker wire that you have removed 5cm of plastic outer-coating insulation off, wrap onto the left RCA preout shield found on the headunit numerous times, until there is no more copper wire to wrap around it. The shield is the metal part that goes around the middle pin on the plug. Repeat this procedure for the second speaker wire, but instead wrap the wire around the right RCA preout shield.

6) Now you will need to actually ground the speaker wires to the cars chassis. Find a location that would be the most suitable, ideally you want a location that reaches to length of the speaker wires that you have used. Existing bolts would be most ideal if the car has any already in place. But if you don't see any, you will need to drill a hole and insert a bolt yourself. Once you have found a good grounding location, using a flat head screwdriver, scratch off any paint or rust around the bolt. This will help make electrical connections better and make the ground stronger.

7) Get a 'ring terminal' that holds 10 gauge wire and insert the remaining side of the speaker wire into the hole where the wire slips into. Then using a pair of 'pliers' to press down the outer plastic where the wire goes into, to crimp the wire into its connector. Do this procedure for the second speaker wire that you are using to ground the RCA preouts.

8) Using a correct sized spanner, remove the bolt and insert the ring terminals into its spot. Once you have done that, replace the bolt you removed and tighten it up.

9) Check that the RCA leads are firmly connected into the RCA preouts found on the headunit. This is to ensure they are securely in, so they don't cause problems later on when you have reinstalled the deck back into its din slot. Once they have been checked, replace the headunit back into the din slot and you're good to go after that!
Read More
Posted in | No comments

How To Stop & Prevent Headphones Leaking Sound

Posted on 09:04 by Unknown

If you have a pair of Dr Dre Beats headphones to listen to music in public places and you have the volume level cranked up all the way on your mp3 player, they will leak sound out into the surroundings. This can become annoying for other people around you because they can hear your music blasting out loud and may find it disturbing. To get around this, you would usually have no choice but to lower the volume levels on your mp3 player.

But, if you like listening to your music with the maximum volume, then you would probably not get your satisfaction out of it, since you can't feel the subwoofer bass. Well thankfully, I have got a way around this and you can still listen to loud volume levels with minimum sound leakage. This can be accomplished with a simple modification made to your headphones. The modification will prevent the sound escaping from the air ventilation vents, therefore reducing the amount of sound leakage that can heard.

1) Get hold of some PVC electrical insulation tape, you know the tape that is used to wrap around exposed wire connections. This tape is the most appropriate to use because if you want to sell your headphones to somebody, you can always remove it easily, without having the paint come of the headphones. Also you can purchase different colors, so you can use tape that matches the outer-plastic of your headphones to give it a stealthy look.

2) You will need to locate the air ventilation vents on the headphone ear cups. They are usually located on the outer plastic of the headphones housing and look like small holes or lines.

3) Once you have found the air ventilation vents, using a pair of scissors cut of the correct amount of tape required to cover up all of the exposed vents found on one ear cup. Cut two pieces of tape that is the same length, since you will be needing the other piece for the other ear cup. The length of the required tape can vary depending on the particular type of headphones you are modding.

4) Using your finger, carefully line up the tape with the vents and press it down. Go over the tape with your finger, so all areas of the tape are stuck down properly and securely. Now that you have sealed the vents on one side, the sound has to were to go, so problem solved! Once you have finished modifying the ear cup, you will need to do the same for the ear cup on the other side.
Read More
Posted in | No comments

Monday, 1 July 2013

How To Make Your Car Exhaust Backfire In Forza 4

Posted on 14:19 by Unknown
Backfire happens when unburnt fuel gets ignited by the hot temperature trapped inside is car exhaust system. Backfire from a car exhaust looks and sounds cool and because Forza Motorsport 4 is a truly based racing simulator, you can hear pops/bangs and see flames backfire from the aftermarket racing exhaust fitted to the cars in the game. Also fitting a racing exhaust modification will also make your car sound more louder and raspy. When you accelerate around 5000-6000 rpm and let go of the gas, the car exhaust will backfire flames like crazy! Doing that with your car on a circuit track like 'Fujimi Kadio' that has a long tunnel sounds crazy and is very addictive experience!

1) Select the car you want to modify to get the backfire sound from the car exhaust.

2)
Read More
Posted in | No comments

Xbox 360 System Link-How Many Players Per Console?

Posted on 02:43 by Unknown

Read More
Posted in | No comments
Newer Posts Older Posts Home
Subscribe to: Posts (Atom)

Popular Posts

  • How To Connect Two PS2 Consoles Together Using a iLink Cable/System Link
    The older fat style PlayStation 2 console has a iLink IEEE1394 port, which allows you to use a iLink cable to connect two similar PS2 consol...
  • How To Remove a Stuck Car Cigarette Lighter Thats Jammed In Socket
    A car cigarette lighter is used to light a cigarette. The cigarette lighter works by pushing the button in, when the metal elements found at...
  • How To Delete Game Saves Off a PS1 Memory Card
    A memory card can be inserted into a ps1 gaming console to save game progress you have made in games you play on the console. However, the p...
  • How To Open & Take Apart Sony PS2 Memory Card / PS2 Memory Card Disassembly
    The Sony PlayStation 2 console uses a memory card to store game save data you have created from playing games. Once the game save data has b...
  • How To Insert Micro SD Memory Card In Nokia 5233
    The Nokia 5233 supports a official maximum memory card size of up to 16 GB. The type of memory card that the phone supports is 'Micro SD...
  • How To Open PS2 Fat Disc Tray Without Power Manually
    The original version of the PS2 console uses a disc tray mechanism to load games into the disc drive, similar to how a DVD player works. The...
  • How To Fix a Broken PSP Wlan Switch Thats Not Working
    If the wlan switch is not turning on the Wi-Fi on the psp console, when switched in the on position, there is a problem. Most of the time ...
  • Does The Nokia 5233 Have a WiFi Connection Setting?
    So i just bought a Nokia 5233 and i have a wireless router, can i connect onto the internet using WiFi? Unfortunately, when Nokia manufactur...
  • How To Fix a Soldering Iron Tip Thats Not Melting Solder Wire
    A soldering iron is widely used in the electronics industry to melt soldering wire to create permanent solder joints onto printed circuit bo...
  • How To Fix PS2 Slimline Loud & Noisy Cooling Fan-Make it Super Quiet!
    So why does my PS2 slimline have a noisy fan? The reason why you hear the cooling fan inside your PS2 slimline spinning like crazy is becaus...

Blog Archive

  • ▼  2013 (99)
    • ►  November (11)
    • ►  October (3)
    • ►  September (25)
    • ►  August (20)
    • ▼  July (30)
      • How To Format Nokia N95 8GB Phone Mass Memory
      • How To Make Your Scalextric Car Go Faster
      • How To Make Your Portable Speakers Louder
      • How To Fix & Prevent a Projector From Overheating ...
      • How To Change & Replace Soldering Iron Tip
      • How To Fix a Broken Soldering Iron Thats Not Heati...
      • How To Change Langauge Setting On TomTom XL GPS To...
      • How To Change TomTom Sat Nav Startup Image Splash ...
      • How To Change TomTom Sat Nav Car Icon Symbol
      • How To Connect Nokia N8 To TV Without Using HDMI O...
      • How To Transfer PSP Game Saves onto Another PSP Me...
      • How To Properly Clean a TomTom Screen Without Scra...
      • Can You Play & Watch DVDs On a Orginal Old Xbox Co...
      • How To Factory Reset a Nintendo 3DS/XL System To F...
      • How To Make PS1 Controller Work On a PS2 Games Con...
      • Can the PlayStation PSP Vita Play & Watch YouTube ...
      • How To Open PS2 Fat Disc Tray Without Power Manually
      • How To Turn On a ATX Computer Power Supply Without...
      • How To Burn In JVC HA-FX1X Xtreme Xplosive In Ear ...
      • How To Connect PS2 EyeToy Camera To PS3 Console Us...
      • How To Remove a Stuck Car Cigarette Lighter Thats ...
      • How To Fix a Car Cigarette Lighter That Keeps Blow...
      • How To Find Out & Check My PSP Firmware Software V...
      • How To Format Your PSP Memory Stick On a Computer ...
      • How To Connect & Setup Chatpad To Xbox 360 Controller
      • How To Fix Smoke/Fire Alarm Detector Beeping Chirp...
      • How To Fix Pioneer Headunit RCA Preout Buzzing Noi...
      • How To Stop & Prevent Headphones Leaking Sound
      • How To Make Your Car Exhaust Backfire In Forza 4
      • Xbox 360 System Link-How Many Players Per Console?
    • ►  June (5)
    • ►  May (3)
    • ►  April (2)
  • ►  2012 (41)
    • ►  November (3)
    • ►  October (2)
    • ►  September (8)
    • ►  August (10)
    • ►  July (18)
  • ►  2011 (366)
    • ►  December (1)
    • ►  October (64)
    • ►  September (65)
    • ►  August (41)
    • ►  July (63)
    • ►  June (132)
Powered by Blogger.

About Me

Unknown
View my complete profile